Malocan
Well-Known Member
i rotated the Matrix for easier editing (no mtrans function) added max; min and average. also split the screen for better handling.
View attachment 3729436
i rotated the Matrix for easier editing (no mtrans function) added max; min and average. also split the screen for better handling.
View attachment 3729436

Taken from the website of MSC15 but all other sources say par can only be measured in these ranges too. Or Par is literally only between 400 and 700nm
Measurement of Effective Photosynthesis Lighting
In order to evaluate the effectiveness of lighting in plant growth, agronomy, greenhouse design and maintenance, Photosynthetically Active Photon Flux Density, PPFD or short PFD radiation is measured. PAR is measured in quantum units of µmol/(m²s) from 400 to 700 nm. The MSC15 spectral measurement method ensures accurate readings regardless of light source type (natural or artificial).
Sorry I often write quicker than I think, I should of said all sources I came across. which was about 6 sites cross referenced. I didn't mean to misrepresent the facts.Eh, I've seen it definined as broadly as 380-720nm. Depends on whose talking, definitely not "all sources".
Hi @JorgeGonzales
if you have time and mood please help me.
i would like to know if i connect one cxb3590 to a ELG-150-54b and then i dimm the cob to 50watt, how high is then the driver load %
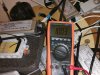
yesDo you have a multimeter?
yes thanksDoes that make sense?

same can be build with 0.1% tolerance for the current with this resistors.
http://www.reichelt.de/Metall-0-1-5...A=2&ARTICLE=12769&GROUPID=3102&artnr=MPR+10,0
vero-board
http://www.reichelt.de/Streifenrast...LA=2&ARTICLE=8275&GROUPID=3373&artnr=H25SR050
testing Amps with that schematic is correct... but i would not use it for some reasons
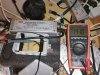
here is a schematic were you can test current and voltage with one Multimeter without changing the circuit
point a is fixed plus or minus does´t matter here. the other probe goes to b for current or c for voltage testing.
the only thing you have to do is changing the voltage range
always start with the 200 v setting and test point c. with the same setting test point b and then change the setting to 2 volts for a better reading...
...this is just a safety rule for working with multimeters... start with the highest range as you never know what going on in a circuit..
.View attachment 3730720
checking Voltage and current at nearly the same time gives real watts as there is no driver influence here ,
simply multiply Voltage and current and you have you have the Power of your cob.
some solutions for the resistor
cheap and simple
http://www.reichelt.de/9-Watt-axial/9W-AXIAL-1-0/3/index.html?&ACTION=3&LA=2&ARTICLE=3657&GROUPID=3118&artnr=9W+AXIAL+1,0
10% tolerance for the current. just a bit high
3 of this 0.33 Ohm resistors in series comes close to 1 Ohm. and powerhandling is 6 Watt
5% toleranz for the current. good enough for a first test
http://www.reichelt.de/2-Watt-axial/2W-DRAHT-0-33/3/index.html?&ACTION=3&LA=2&ARTICLE=2262&GROUPID=3116&artnr=2W+DRAHT+0,33
-----------------------
more work, needs soldering. a vero-board helps alot...
10 of this 10 Ohm resistors in parallel gives 1 Ohm. powerhandling is also 6 Watt
here we have 1% tolerance for the current.
http://www.reichelt.de/0-6W-1-10-0-Ohm-97-6-Ohm/METALL-10-0/3/index.html?&ACTION=3&LA=2&ARTICLE=11448&GROUPID=3076&artnr=METALL+10,0
same can be build with 0.1% tolerance for the current with this resistors.
http://www.reichelt.de/Metall-0-1-5-10-Ohm-82-5-Ohm/MPR-10-0/3/index.html?&ACTION=3&LA=2&ARTICLE=12769&GROUPID=3102&artnr=MPR+10,0
vero-board
http://www.reichelt.de/Streifenrast...LA=2&ARTICLE=8275&GROUPID=3373&artnr=H25SR050


my meter does that automatic. my first thought is that clu058@49watt is just better or similar good, but maybe im wrong or my tests. Citizen chip has bigger LES and is much newer in compare to cree cxb 3590.Does your meter adjust for spectrum? Seems like the 3500k should be a bit more higher than the 2700k. Or is the clu058 just that good?

