ZoBudd
Well-Known Member
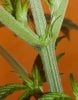
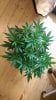
Thanks for the advice. I was a bit worried about the 1" spacing. At least I can easily re-string for 2" or 3" spacing and the string allows a lot of flexibility with pulling branches through. The Cotton Candy clone that I'm using is really leggy right now.Looking really good!
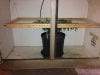
1inch spacing may be a bit of a pain to weave in though - I imagine it'll be pretty tight to pull your branches through with leaves and all on -- remember, they first need to grow up through the space, then get pulled back down and stuck into the next space... I have 2 inches on mine, and it sometimes even got to be a pain with that double space
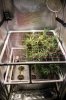
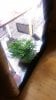
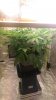
Oh and what is that on the floor of your cabinet? Hopefully not mold?
I'd be tempted to clean that before the scrogging gets seriously started...
Cheers
Oh, it's a rust stain on the floor of the cabinet. Despite it's appearance everything is cleaned and disinfected in this old piece of junk and the pot is in a saucer.