cxa3070s@350mA orientation

Greengenes707

Well-Known Member
Congrats. That's cool to hear. I'm headed down that road soon too.
I want to narrow up my setup a little but it won't work to just turn the AT body...shit is in the way. I will just test it as is and see. I think tent situations and reflectivity will help. Remember that I am driving them 2X as hard as you. So spread and heat are a little different per situation. I wanted to do a PAR map of on cob...but was too excited and just built my whole light.
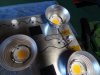
I agree on the color...very warm, sun like. I enjoy being in there. Yours will be the same. And these babies have been proving themselves left and right in peoples gardens already.
DIY has been a blast. I waited for everything too before firing anything up...was very hard, but when your finished you feel like the fucking man.
 

Positivity

Well-Known Member
The workbench cxa shot..haha. Wonder how much of that is going on :blsmoke:

Was trying to focus in on your solder joints in the stars..it's a little hard.

Are those peaks and kinda over large solder piles? Should be insulation on the wire up to the solder pad too.

If they are..I get those when I've been working the solder too much. Should try and get a nice shiny not too large joint...some just look on the verge of shorting out on something.

I usually fix that by swiping off the old solder with the solder iron tip...filling with new solder...swiping it off...then putting just the right amount of new clean solder. Sometimes it takes a few times to get back to a nice shiny blob.

clean the tip and tin a lot helps too...I use this thing between every solder....http://www.amazon.com/Hakko-599B-02-Solder-Cleaning-Holder/dp/B00FZPGDLA/ref=sr_1_10?ie=UTF8&qid=1404114677&sr=8-10&keywords=Solder

Helps to have the wire cut so just enough is exposed..very little..like 1/8 ". Pre tin it...then just solder it on.

One last thing..I use to try and use just enough wire in a straight line. I find it a lot easier and less frustrating when I just use extra and put a few bends in it.

Just some solder tips...works for me. Best thing was a good soldering iron..

Here's a shot of what I try and aim for. When I run full current there's rarely a problem...but when dimming...not so good connections become quickly apparent with annoying flickering

image.jpg
 
Last edited:

Scotch089

Well-Known Member
thank you pos yes those are some NASTY solder joints, i even hopped on youtube to try and figure out what I was doing wrong because some wouldnt take to the plate on the stars, sure enough i was just having wayyy too much trouble, I did go ahead and come out here and clean a few up, especially this one (top left luxeon that I battled and battled, prbably went down to a third of the orignial solder lol.

I think II will be able to use a 100ohm pot for my x4 prolimatech 140mm fans, 12V, .2A. I have a terminal so having them in parallel shouldnt be aa problem. Just hope when they are arrive everythng runs how it should!
 

Positivity

Well-Known Member
If your having a hard time your solder irons not getting hot enough

Soldering is easy when your solder iron gets hot enough.

The heat is getting wicked away by the heatsink faster than your solder iron can heat it up..

So you can stick a piece of wood like a Popsicle stick under the star..that helps a bit.

But seriously..if the iron gets hot enough..it makes all the difference in the world. I spent lots of time fighting the solder iron. With my new solder iron it went from aggravating to seconds.

This is what I use...http://www.amazon.com/Weller-WES51-Analog-Soldering-Station/dp/B000BRC2XU/ref=sr_1_1?ie=UTF8&qid=1401122588&sr=8-1&keywords=weller+soldering+iron

This is what sds recommended as a cheaper option...http://www.pollin.de/shop/dt/Mjk4OTUxOTk-/Werkstatt/Loettechnik/Loetgeraete/Loetkolben_Weller_SI_25.html

I think sds is extra good to make that work though..lol. For people like me the extra heat from the bigger Weller gets it done.
 

Positivity

Well-Known Member
4 fans on one pot?

I'd be interested in that for sure...I was trying to figure out how to get all my fans on one. I have a mess of wires from 4 seperate small pots
 

Scotch089

Well-Known Member
4 fans on one pot?

I'd be interested in that for sure...I was trying to figure out how to get all my fans on one. I have a mess of wires from 4 seperate small pots
What rating is your pot and your fans' settings? Out of all the digging I've done all I've found is "get one big enough". Lol. So I'm just V x A=W x4 and V/A=R x4, knowing what yours is for one fan would shed some light if I'm on the right track or not. SDS said to make sure they're in parallel but that was it, so I think having the terminal will help. (6-pole)

Edit: this is the best source I've found so far..

http://forums.pcper.com/showthread.php?296710-fans-potentiometer-or-rheostat
 

Positivity

Well-Known Member
I tried to find the pot size once but it wasn't listed anywhere.

I too figured a bigger pot would do it but never tried it. Was a little scared of hurting the fan. I actually toasted one fan by connecting the power lines to the pot and the pot lines to the dc...haha...smoke and the fan pot line was dead
 

Scotch089

Well-Known Member
Shit.. Well that's not very promising huh lol. I keep forgetting the pot is 100k, not just 100,

Hey does the ledil reflectors come in 80*, I can only find the Angelina and regine (15*) on mouser
 

SupraSPL

Well-Known Member
Scotch what is your soldering iron wattage? The trick to soldering on a large heatsink is to solder hot and fast. Put a dab of flux gel on the solder pad then using 63/37 or 60/40 lead solder, pre tin the solder pads thoroughly with a good hot iron ~40W. Then pre tin your wires the same way. Same thing, a dab of flux gel then tin thoroughly. Once they are both pretinned, you can attach the leads with ease. You can put a small dab of flux gel on the pads before connecting the leads to make it look smoother if you like to.

One thing to watch out for though, make sure the wire is not pulling on the pad and blow on the connection after you solder it to cool it down. When the solder pads are very hot they can be susceptible to damage, especially if the wire is pulling on it before it cools.

Once you are all done, it might be a good idea to check for continuity between your solder pads and the heatsink base. That can happen if the solder blob gets too big and touches the side of the star.
 

Scotch089

Well-Known Member
I checked to make sure the leds lit up ON the solder connections, Im using a big ol "two prong" solder gun, it gets red hot on the second setting, its more user error than anything. (palm-to-face) for some reason I just couldnt get a couple of them to stick to the pads without battling them, one I even just about burnt off the pad and had to use the second. I pre tin the pads/wire and still fought em. BUT, were halfway there right? lol only the xmls left. Practice makes perfect! I actually had the solder roll off the pad and onto the heatsink/side of the star and that worried me id make the whole panel "live" when I replaced the big blobs, but now they are SOMEWHAT clean. I guess I don't know how to check the continuity though

I did post something on another forum pos so maybe we'll get a definitive answer about several fans on one pot.
 

Positivity

Well-Known Member
Dang you need the pen type solder iron...way more precise! The pen tip is what you need..

You will fry the leds eventually if the solder isn't confined to the pads. That will get really expensive with cxas..

Really think you should redo all of the connections until they all are just right. That solder iron even though red hot doesn't sound like the right tool for the job. My Weller doesn't get red...but the solder instantly melts.

I still can't do a ledengin star on the heatsink. It wicks heat way faster than every other star for some reason. The only way I can do those without ruining the solder pads on the star is by doing it on something other than metal...piece of scrap wood.

I'd strongly recommend a trip to the hardware store and at least try a Weller pen type or similar...shouldn't be too expensive.

Or put a Popsicle stick under the star...something..

Those solders can't be very strong if it's not getting hot enough!

Sorry for the rant!! I just know what you got going on over there..:peace:
 

SupraSPL

Well-Known Member
My cheapo 60W iron just died so I got a Weller 40W $21 on Amazon and this thing has plenty of heat to solder on a large heatsink. Because of the way I do my installs I always solder after the star is pasted to the heatsink so I can't use the popsicle method. The pads will take the solder much more easily with flux gel $10 Amazon. I know the solder has flux in it but for whatever reason it is much easier to pretin by applying the flux to the pads. I also noticed that the Steves LEDs stars are the hardest to get the solder to flow onto but the flux solves that problem.

Most voltmeters can check continuity, or if they have a "diode test" mode that basically does the same thing. You put one probe on the heatsink and the other probe on each solder point. If there is continuity it will beep at you. You can also do a visual check just to make sure the solder is not contacting anything but the pad.
 
Last edited:

Positivity

Well-Known Member
" I also noticed that the Steves LEDs stars are the hardest to get the solder to flow onto but the flux solves that problem."

I think we just find different ways that work for us. I tried flux before a new solder iron and I still couldn't get it to go. The big iron was my trick that's been steady...not to mention no degradation in performance yet.

One of the key signs to me that a iron isn't hot enough ...is when the solder balls up and rolls off. When it's hot enough it settles right in instantly...no pad warming.

I do all my soldering with the stars installed too...only the ledengin..impossible on a sink in my experience. Just gotta solder it on a table with extra long wires...nail it down..then connect up to other stars
 

SupraSPL

Well-Known Member
Yes that is definitely true. SDS hates flux and I cant figure out how I got along without it for my first few years. I like to apply the solder onto the tip of the iron first (which burns off most of its internal flux) and then apply the solder to the pad or wire in a separate step. I have tried feeding the solder directly to the pad with the iron in place, but it just doesnt work for me. Other DIYers might struggle with that method just depends on your preference.

One thing is for sure, my early solder joints were embarrassing and took forever. I was soldering on an oversized heatsink using a 26W iron, the solder-onto-tip-first method and no flux gel :o 
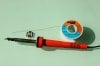
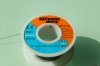
I guess it could have been even worse if I had tried using a lead free solder. At the time I didn't think they were bad at all, I was just excited to be growing with LED :cool:
DSC05247a.jpg
 
Last edited:

Scotch089

Well-Known Member
hahaha thanks for the love guys, I did go through and redo all hte solder connections- removed the wires, wicked the solder back onto the gun and wiped it away till I had a cleaner connection. Still not ideal but it is definitely progress. I will probably get a pen style solder gun, sounds like it'd be worth the investment and I am thinking of starting over with the wire to get cleaner connections, maybe blue to match the fans.. I did check the continuity of the panel and everything came out great (no beeeeeeps.)

I did get my 100k dual pot's in the mail today, surprised because the vendor had the shipping info as still in china this morning. So at least I have the ones for the drivers (I ordered x10 for 6 bucks vs. x1 for 2) Don't think ill ever use all of them but its good to have em in case of future projects (growlight, or life) that they'd match up to.

I DID talk with my maint. men at work today about pots and how to determine the ratings for several fans, all we do is calculate the Ws and Ohms TOTAL and bam. Only wire we'd have going to the pot is the live wire.

Which leads me to my next question regardiing the Prolimatech Blue Vortex 140mm fans:

Red is Hot, Black is Neutral, but what is the White? usually ground is green and yellow, is it a speed wire? Could this change the game of wiring the pot and fans..

I did find a pack of x5 10w/250ohm pots, but I have to have a minimum order of 15 bucks. SO. browsing through and seeing what else I could "use/need"

be safe everyone! c'mon xmls!
 

epicfail

Well-Known Member
When I started soldering I was using a 25w weller with Home Depot solder on little arduino pins and it didn't work out to well. I found that the solder was WAY too thick and I could not get it to work. I also found that I needed to get into tighter spaces than my irons tip would allow me to fit into. The solution to that problem was to get thinner solder (0.4mm), wrap a copper wire around my irons tip and sharpen it to a very fine point. It allowed me to fit into the smaller holes I was soldering. I picked up some proper 63/37 solder at the local electronics store and from then on it was much easier, nice and shiny little joints.

solder 1.JPG solder 2.JPG solder 3.JPG solder 4.JPG

I have also used more flux sometimes when tinning wire tips but I think a hotter iron(40w) would allow me to work faster not needing so much. Everyone is going to find a technique that works best for them, for me the thinner wire made it easier to make smaller blobs and cleaner connections. I haven't tried soldering any stars yet but I don't think i would need my custom tip for that, the pads on the cxa's and stars are quite big in comparison to the LCD connections in the picture.
 

Scotch089

Well-Known Member
alllllright, so I hooked up a single fan to the terminal-->power supply from the pro grows, and the PSU just squealed like a dying miniature pig.

The fan is over capacity? Does any one know what this is, I've done some googling and the only thing I can come up with is the psu isn't powerful enough. 'pparently for four fans id be looking for a 12VDC, 800mA psu. Can anyone confirm this? I AM looking for an AC/DC conversion right? (for dc fans)

Other than that, I did not find 250ohm 10w pots, they were resistors. but I did find x2 100ohm 5w'rs so I went ahead and ordered those.
 
Top