My new grow room

Jim McColl

Member
Thought i'd just share with everyone the start to finish process of my new grow room project...

I'm a joiner/carpenter/miracle worker by trade and can also tackle electrical, plumbing, plastering, tiling, glazing jobs with ease although not qualified... because of this i have all the tools and knowledge to build me a "bad ass" grow room... :D

All the materials i'm using cost about 120 bucks. Screws, cable, socket mounting boxes, etc were free as being surplus from previous jobs.

The design is going to be based on 2 grow rooms. The bottom will be cloning/ cutting/veg room and the top will be the flowering room.

overall dimensions:
Height- 3 metres
Width- 1.5 metres
Depth- 1.1 metres

Flowering room area- 3.3m3
Cloning/Cutting/Veg room area- 1.65m3

Once complete, from the outside this grow room will look like a built in wardrobe... there will be no sound, smell or light escaping at all from the grow room. skirting's and facings will be fitted and all exterior walls plaster skimmed and decorated.
 

NeoAnarchist

Well-Known Member
looks like a work in progress. what kinda lighting are u gonna setup in there? the best bang for ur buck i think is the 600w imo. it'll be so much better having two rooms for ur lil ones. i love having a veg/mum cab and a flowering room. i wouldnt mind having 3 rooms tho, one for clones/mums the other for veg and the last for flower. just to give the little ones sum veg time. whats the other room lookin like?
 

Jim McColl

Member
Day 2

Finished internal cladding, completed front framing, created separating shelf, started external cladding with plasterboard.

in total 10 sockets have been wired into this. 6 in the flowering room and 4 in the veg room. (can't run out of sockets now! :D)

As per usual i've over engineered my design... actually think you could use this to breed elephants in! it's fricken massive! (separating shelf is strong enough to support a small car!) oh well... :D

the last pic looks at bit odd- reason being it's 3 pics edited into 1 (couldn't fit the whole thing into 1
 

Attachments

Jim McColl

Member
looks like a work in progress. what kinda lighting are u gonna setup in there? the best bang for ur buck i think is the 600w imo. it'll be so much better having two rooms for ur lil ones. i love having a veg/mum cab and a flowering room. i wouldnt mind having 3 rooms tho, one for clones/mums the other for veg and the last for flower. just to give the little ones sum veg time. whats the other room lookin like?
basically what you can see from the second group of pics is that both rooms are built into one area... the flowering on top and the veg at the bottom.

i'll be running 2x 600w cooled HPS in the flowering room and 2x 240w CFL in the veg room... i'll see how it runs and then modify the light setup later.
 

Jim McColl

Member
How do you intend on keeping you room odourless? I mean do the carbon filters work 100%?
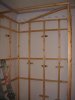
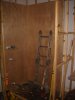
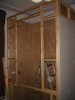
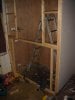
Once the room are complete they will be virtually airtight. I’ll have an air inlet fan which forces 160m3/hr of fresh air into the rooms and an extraction fan which will remove 350m3/hr of used air out of the rooms. (the formula i used for this calculation is underneath) It's important to ensure the extraction fan is always more powerful than your inlet fan. This is to avoid Negative pressure which basically means instead of all the used smelly air being removed by your extraction fan, some of the air is forced out of gaps within the grow room construction itself. if this happens then you'll be bypassing your carbon filters and releasing odour into areas where you don't want it to be!
2 x carbon filters will be used in my new grow rooms and from tests which I’ve carried out already in my old grow room the extracted air is virtually odourless! :D just to be extra safe though, i’ve vented the extracted air into the soil vent pipe of the property the grow rooms are located at. This vent pipe travels up though the loft and out of the roof at an actual higher point than the property itself... no one at all will be able to smell anything!


Dan's Method
Calculating By Room Volume
You will find many calculations on the web for sizing a fan for ventilating indoor gardens; however, what many of these calculations fail to take into consideration is the friction loss on carbon filters and increased temperatures from HID lights. So here's my calculation method which you can use as a guide for sizing an exhaust fan for a growing area (keep in mind that this calculation will give you the lowest required CFM (Cubic feet of air per minute) required to ventilate the indoor garden.)

Step 1: Room Volume
First the volume of the room needs to be calculated. To calculate multiply length x width x height of growing area e.g. A room that is 8' x 8' x 8' will have a volume of 512 cubic feet.

Step 2: CFM Required
Your extraction fan should be able to adequately exchange the air in an indoor garden once every three minutes. Therefore, 512 cubic feet / 3 minutes = 171 CFM. This will be the absolute minimum CFM for exchanging the air in an indoor garden.

Step 3: Additional factors
Unfortunately, the minimum CFM needed to ventilate a indoor garden is never quite that simple. Once the grower has calculated the minimum CFM required for their indoor garden the following additional factors need to be considered:

Number of HID lights — add 5% per air cooled light or 10-15% per non-air cooled light.

CO2: add 5% for rooms with CO2 enrichment

Filters: if a carbon filter is to be used with the exhaust system then add 20%

Ambient temperature: for hot climates (such as Southern California) add 25%, for hot and humid climates (such as Florida) add up to 40%.

An Example
In our 8' x 8' room we have 2 x 1000w air cooled lights, and we plan to use a carbon filter. We also plan to use CO2 in this room. The ambient temperature is 90 °F (32°C), however, we will be using air from another room that is air-conditioned. Here's the minimum required CFM to ventilate room:

1) Calculate the CFM required for room (see above.)

2) Add 10% (for 2 air cooled lights.)

3) Add 5% of original CFM calculation (For CO2.)

4) Add 20% of original CFM calculation for Carbon Filter.

5) Air is coming from air-conditioned room so no need to add any other percentages.

6) CFM = (171 CFM) + (171CFM x 10%) + (171 CFM x 5%) + (171CFM x 20%) + ( 0 )= 231 CFM.

This is the absolute minimum CFM required to ventilate your room.

The next step might seem to match the closest fan to this CFM. However, for this example I'd choose a six inch fan with a CFM of around 400 or more, and a 6 inch carbon filter to match. The extra CFMs may seem a bit excessive (calculations on most indoor gardening websites would recommend a 4" fan and a 4" carbon filter) but it's always better to over-spec since we need to compensate for air resistance in ducting too.

Also, as we are using a carbon filter we will need to match the fan with the filter so that the fan that will neatly fit onto the filter.

If all the variables are kept the same and we changed the room size from 8' x 8' to a 12' x 12' then the minimum required CFM would be 519 CFM.

The All-Important Inflow!

An intake port can be anything from a gap under the door to an open window - even a hole in the wall. The best place for an intake port is diagonally opposite from your exhaust fan; that way, air has to pass across the entire room - very efficient. You can put a piece of screen over the opening to keep insects and animals out, a piece of A/C filter to keep dust out, or a louvered shutter or backdraft damper that opens when the fan turns on and closes when it turns off. You can also use a motorized damper. This gets installed in-line with your ducting and is plugged into whatever device controls your exhaust fan. When your fan turns on, it allows air to pass. When your fan shuts off, it seals completely, preventing CO2, air, etc. from passing. You can get creative with these devices and use one fan to control two rooms, etc.

One additional note about intake ports - you will see much better results from your exhaust system if you install a second fan to create an active (as opposed to passive) intake system. Normally, when your exhaust fan sucks air out of your room, air is passively going to get sucked back into the room. By installing a second fan on the intake side, you will reduce the amount of negative pressure created in the indoor garden, thereby cutting down greatly on the amount of work the exhaust fan has to do and allowing much more air to pass through. If you're not sure or you don't want to spend the money, start out with just an exhaust fan. If it's not performing as well as you thought it would, try adding an intake fan - you'll smile when you see the difference!
 

Jim McColl

Member
Day 3

fitted ceiling and cut access hatch to allow access to light ballasts (they're going to be fitted above the grow room, on top of the ceiling)

filled screw holes, all joins and internal corners with suitable flexible sealer. once the doors are fitted a draft seal will be set around the door stops creating light/ air tight areas...

bored hole in ceiling to accept the 100mm ducting, attached ducting and fitted to soil vent pipe located within the loft of the property.

Painted top grow room with first coat of bright white emulsion.
 

Attachments

MagicA

Well-Known Member
Looks like a great room Jim! I really loved the info on ventilation and carbon filters etc. I have an 8 X 4 X 6.5 tent and I thought I was going to be going overboard with a 6" vortex fan (449 cfm) plus a 6" carbon filter but it looks like I will be ok :P

Thanks again and room looks great!
 

new2diz

Member
Thanks for all your info buddy. I am looking at building a room based on your design but mine needs to be mobile as I am in a rental house and cant really go bashing holes everywhere.
Your a Ledgend.
 

magilla gorilla

Well-Known Member
holy fucking tits... nice room you got going. Looks like my W.I.P except you haven't cheaped out like i have plus i lack your craftsman experience...ace effort imo
 

tea tree

Well-Known Member
Nice to see a permanent room. I am watching Twin Peaks the series and the dude here is an orchid grower. In his house he has a full on orchid growroom built in there. He is a shut in so the entire house is to grow! Lol, orchids are a funny plant, they grow in almost all hydro media like they were in soil. Orchid sites are good to buy mediums on I found. Anyway, I digress, nice room, I saw you were filling in the screw holes? So this is perm then? Jorge cervantes says to only use screws aas you can take it down when you want. + reps nice pics.
 

Jim McColl

Member
Looks like a great room Jim! I really loved the info on ventilation and carbon filters etc. I have an 8 X 4 X 6.5 tent and I thought I was going to be going overboard with a 6" vortex fan (449 cfm) plus a 6" carbon filter but it looks like I will be ok :P

Thanks again and room looks great!
glad it helped you... :D

when buying a fan from grow sites they don't give you info like that. i actually started off researching the physics behind air extraction for my grow room as i knew the suction wouldn't be the same as what the supplier specified after I'd attached my filters, lights etc... stumbled upon that formula and it saved a lot of time! :D
 

Jim McColl

Member
Thanks for all your info buddy. I am looking at building a room based on your design but mine needs to be mobile as I am in a rental house and cant really go bashing holes everywhere.
Your a Ledgend.
holy fucking tits... nice room you got going. Looks like my W.I.P except you haven't cheaped out like i have plus i lack your craftsman experience...ace effort imo
Nice to see a permanent room. I am watching Twin Peaks the series and the dude here is an orchid grower. In his house he has a full on orchid growroom built in there. He is a shut in so the entire house is to grow! Lol, orchids are a funny plant, they grow in almost all hydro media like they were in soil. Orchid sites are good to buy mediums on I found. Anyway, I digress, nice room, I saw you were filling in the screw holes? So this is perm then? Jorge cervantes says to only use screws aas you can take it down when you want. + reps nice pics.
thanks guys! :D

i figure if a jobs worth doing, it's worth doing properly! i've got a few weeks to spare so might as well make something thats going to last. plus it's helping me get rid of all the spare materials i have from previous jobs! :D

i realise there'll be a lot of people who think it's a total waste of time and effort... a tent or a less sturdy grow room will do just as good and get the same grow results... they're right! but this is me... i enjoy designing and making things. :D:D

thanks for the +rep and support guys! :D

not seeing the girlfriend tonight so gonna work on... i'll post updated pics later tonight.
 

MagicA

Well-Known Member
Well here's one tent user who would love to have your setup and skills Jim so kudos to ya and best of luck!
 
Top