ManiacPack
Member
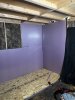
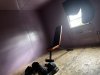
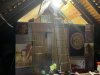
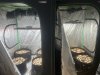
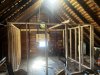
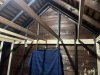
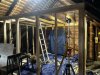
I hope everyone is doin well, im just stoppin by to show off my grow room I just finished. I used to grow in my uninsulated attic but it was frustrating because of how hot and how cold it can get up there. I decided I wanted to build an insulated grow room in the attic off a wall with a window so I could use an air conditioner in the summer.
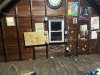
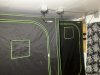
I used to have my tents set up here so I already had all my electric where I wanted it.
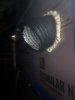
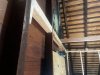
the stairs coming into my attic are too tight to get lumber up, so I had to hoist all lumber thru the window with a rope. My buddy lent me this milwaukee nail gun and it made things so much easier.
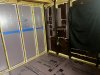
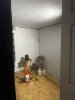
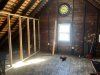
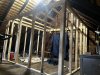
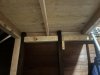
Since I built off the existing wall in the back, I just doubled up 2x4 and cut them snug so they could be hammered in between the studs and then nailed. there wont be much weight on top anyway aside from 2 cats and light storage.
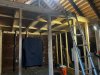
I decided to make my studs 24" o.c to save wood and I framed in a space for a door. Ive never really framed anything out before with wood, but im an electrician so i have many tools and I just got laid off so I had plenty of time on my hands.
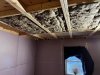
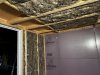
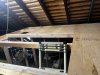
I wish I had planned the back wall out a little better but it all worked out okay. just sucked sheathing the top since I went all the way to the back wall so I had to cut out around studs.
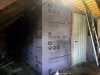
I went with 1/2" plywood for the roof, and had to cut all 4x8 boards in half to get them into the attic. originally I was thinking id do the whole outside and inside in plywood, but I hadnt thought about how heavy it would end up until I started sheathing the roof. This house is over 100 years old and im not sure of the structural integrity of the attic floor, so I had to come up with something else.
I used to have my tents set up here so I already had all my electric where I wanted it.
the stairs coming into my attic are too tight to get lumber up, so I had to hoist all lumber thru the window with a rope. My buddy lent me this milwaukee nail gun and it made things so much easier.
Since I built off the existing wall in the back, I just doubled up 2x4 and cut them snug so they could be hammered in between the studs and then nailed. there wont be much weight on top anyway aside from 2 cats and light storage.
I decided to make my studs 24" o.c to save wood and I framed in a space for a door. Ive never really framed anything out before with wood, but im an electrician so i have many tools and I just got laid off so I had plenty of time on my hands.
I wish I had planned the back wall out a little better but it all worked out okay. just sucked sheathing the top since I went all the way to the back wall so I had to cut out around studs.
I went with 1/2" plywood for the roof, and had to cut all 4x8 boards in half to get them into the attic. originally I was thinking id do the whole outside and inside in plywood, but I hadnt thought about how heavy it would end up until I started sheathing the roof. This house is over 100 years old and im not sure of the structural integrity of the attic floor, so I had to come up with something else.