jondamon
Well-Known Member
Hello everyone,
I get asked quite often "How do you transplant your plants?"
So i thought i would write this little tutorial to help people out.
First things first.
I always have plenty of POTS and i recommend you always keep some of yours as spares to make it easy at Transplanting time.
Step 1
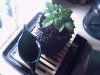
Preparing your new pot.
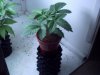
When its time to transplant my little ladies, i get my new pot and a spare current pot and begin filling my new pot with my medium until I can back fill around my current pot.
Step 2
Watering your new medium.
This is where i begin to water the new medium leaving the current pot inplace.
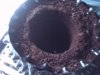
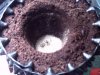
Step 3
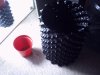
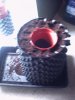
After i have watered, i then remove the current pot and add some Mycorhizae fungi into the bottom of the pre-made hole.

Step 4
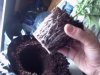
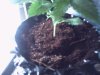
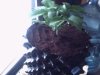
Removing the Plant and planting it in its new home.
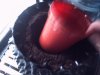
This is where i take the plant and gently squeeze around the pot trying to loosen the medium around the edges so that the plant slips out of the pot easily. Then i place the plant into the premade hole packing it down and water it in until i get runoff out of the bottom.
I hope that this helps those of you out that have trouble when it comes to transplant time. This can be done with pretty much any size pot within reason.
J
I get asked quite often "How do you transplant your plants?"
So i thought i would write this little tutorial to help people out.
First things first.
I always have plenty of POTS and i recommend you always keep some of yours as spares to make it easy at Transplanting time.
Step 1
Preparing your new pot.
When its time to transplant my little ladies, i get my new pot and a spare current pot and begin filling my new pot with my medium until I can back fill around my current pot.
Step 2
Watering your new medium.
This is where i begin to water the new medium leaving the current pot inplace.
Step 3
After i have watered, i then remove the current pot and add some Mycorhizae fungi into the bottom of the pre-made hole.
Step 4
Removing the Plant and planting it in its new home.
This is where i take the plant and gently squeeze around the pot trying to loosen the medium around the edges so that the plant slips out of the pot easily. Then i place the plant into the premade hole packing it down and water it in until i get runoff out of the bottom.
I hope that this helps those of you out that have trouble when it comes to transplant time. This can be done with pretty much any size pot within reason.
J
