homade hydro grow

stupidlizard

Active Member
Hi all, I have been reading this forum for about a year now and i must say i have learned alot. this will be my third grow. The first one was some thc bomb and my last grow was ak47, they are so good, i grew them in soil 12/12 from seed and i pulled an ounce dried off one plant about a half dried and the third i got about 3/4 dried. I was most impressed with the 12 12 from seed. I will be going back to that method after i figure out hydro.
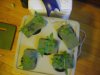
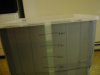
My setup is a grow tent 3x2x6 with a 400 watt mh with a cool tube and a 6" inline fan. two 8 gal buckets with holes cut in top for pots, 48" bubble wand with a 40gph airpump. Im still waiting on hydroton so i cut some slits in some foam and put each plant in there for now. I started these 7 trainwrecks in soil on 1-27-09 so that will be there b-day. on 2-19 I transplanted to hydro, I washed off all the roots as best as possible and put them in the water. The first few days they were a little droopy but looked healthy. but yesterday i noticed a clear gel like substance growing on the part of the roots that are above the water (about an inch) does anyone know what that is? and then today i noticed that on most plants the second set of leaves are yellowing, they are on there fourth set of leaves now.
as far as what i put in the res: orchid nutes 19-31-17 I use 1/4 teaspoon per gallon, smart zyme for that good bacteria and instochlor to get rid of chlorine.I set the ph for 6.4 and i dont know what water temp is yet but its gotta be in the 70's during the day. 60's at night.
ok so this morning i figured i would clean out the rez and start over so i just did that and now im waiting. here are some pics.
 

Attachments

Roseman

Elite Rolling Society
We have done tests and the chlorine dissipate within minutes from the tap, especially if you runt he water over the warm part of the palm of your hand. DO NOT ADD ANYTHING TO DO AWAY WITH THE CLORINE.. Do not use water that sat out and uncovered or was stored.
.
pH Problems
If you have a PH problem, you simply did something wrong. You should make sure that the PH of the water going into the tank is very close to 6.2. Anything between 5.8 and 6.8 is OK, but 6.2 works best. When you first set up your tank, you should do a PH test on your water before adding the water to the tank, using the enclosed PH test strips. Then adjust the water with PH UP or PH DOWN before it goes into the tank. That way, the PH perfect nutrients will work best. It can be dangerous to adjust the PH in the tank, especially if you overly adjust it. It is also dangerous to adjust it frequently. A very slight adjustment is OK, but if you change it drastically in the tank by using a large amount of PH UP or PH DOWN, you are taking a big risk of seriously harming your plants. If you do a test on your tank's water and it is extremely out of range from 5.8 to 6.8, then it is best to drain it and replenish it with PH corrected water and nutrients. (see the 8 Step Remedy) Let us repeat, you should add the nutrients to PH perfect water to start with. If you insist on adjusting it in the tank slightly, then use no more than 1/2 level teaspoon of PH UP or PH DOWN to the tank, and no more frequently than 4 hours apart. Plants do not adjust well to rapid changes in PH levels. The results can be Nutritional Lockout. Remember, if you make a mistake then you can easily and rapidly correct it, by using the 8 Step Remedy.


THE 8 STEP RECUPERATION AND RECOVERY REMEDY

1. Check the roots. If they are discolored, reddish or brown, or present an unpleasant odor, you have a problem. If they are weak, soft or mushy, you have a problem. Also while checking the roots, observe the temperature of the water. If it is warmer than "luke warm" you have a problem. This problem is probably what is referred to as "root rot" or a disease known as PYTHIUM. Remove the dead brown roots by trimming them away with sharp scissors. Do not leave them in the tank.
2. Check the humidity and temperature of the grow area below the lights in the "growing zone" when the lights are on. A temperature of above 82 degrees or below 67 degrees will slow growth, but it is not a serious problem that will kill your plants. Temperatures below 62 degrees or above 90 degrees will stop growth. An extremely high temperature in the upper 90s or below 58 degrees can slowly result in death of your plants. The most efficient temps for growth are between 72 to 80 degrees. Any Humidity between 40 and 60 percent is acceptable and desirable.
3. Check the "lights off, nighttime" temperature. Most desirable is ten to 15 degrees cooler than the daytime "lights on" temperature, averaging 66 to 70 degrees.
4. Check the distance between the tips of the plant and the tip of the light bulb. If you observe yellowing or leaf curling tips, then move the lights one inch further away. A good rule of thumb if you use HID lights, is hold the soft palm of your hand at the leaf tip and see if the bulb is too warm to your hand. If you use Stealth Hydro's compact fluorescent bulbs, we recommend a distance of three or four inches for the 65 and 85 watt bulbs and 4 inches to five inches for the 105 watt bulbs. More mature plants can handle the bulbs slightly closer.
5. Check the position of your fans. Air movement is very necessary for the health of your plants, but too strong of a fan can cause wind burn. Direct your fan toward the tops of the plants and toward the lights. Never position the fan blowing strongly downward on the leaves.
6. Add 1/4 teaspoon of hydrogen peroxide to a quart of water and add it to the tank of six gallons already in the tank. Wait ten minutes and then turn the water and nutrition solution pump off to prepare to drain the tank. Poor at least a cup of clean water through each grow cup, onto each rockwool cube and through the hydroton rocks.
7. Drain or pump the tank empty as possible without damaging the pump by running it dry. Add two gallons of additional clean water with 1/4 teaspoon of hydrogen peroxide again and then drain it away too. Again, empty the tank as empty as possible without burning up your pump.
8. Add fresh PH balanced water and nutritional packets as prescribed. PH test it again.

The above 8 steps should repair and remedy any health problems that your plants experienced within the next two days. Now is the time to try and determine what caused the problem to start with, by investigating and researching typical hydroponics problems and illnesses. Here are a few DIAGNOSIS TIPS.


Typical Hydroponics Problems and Illnesses

Underfeeding and Weak Nutrition
The entire plant, both upper and lower leaves, will show lime or light green in color.
The plant will not eat, drink or show growth.
It is time to follow the 8 Step Remedy.

Overfeeding, Use of Too Strong Nutrients
The leaves will curl downward. They grow very dark dull flat green and then the tips show signs of burn.
It is time to follow the 8 Step Remedy.

Nutritional Lockout
You know that you have made recent PH adjustments. You might know you may have used too much of the PH Adjustment Solution. You may have failed to test the PH often enough. You notice the plants did not eat or drink because they did not consume the same amount of water they used yesterday. You see rust spots. The large lower leaves are prematurely dying and you are not in the BLOOMING or FLOWERING stage.
It is time to follow the 8 Step Remedy.

Wind Burn
You had the fan blowing downward toward the upper side of the leaves, instead of blowing up through the node spaces or toward the lights. You observe the leaves becoming dry or even crispy, perhaps shriveling, and the tips curling upward. The leaves do not appear glossy, moist and vibrant.
It is time to follow the 8 Step Remedy.

Water, Nutrition Solution or Roots Are Discolored Brown Or Have an Unpleasant Odor
You notice your water is becoming brownish in color, or smells distasteful. Your solution does not smell pleasant and appetizing like fresh lettuce. Your roots are not the same shade of white that they once were a week ago.
It is time to follow the 8 Step Remedy.


PRODUCT CATEGORIESBubbleponics™ SystemsBubbleponics™ Combo KitsDWC Hydroponics KitsHydroponics ReservoirsHorticultural Light SystemsReplacement Light BulbsSeeding & PropagationIn/Outdoor Organic GrowingHydroponics FertilizersHydro Organic FertilizersOrganic FertilizerspH ControlElectronic pH MetersElectronic TDS MetersWater Filtration SystemsNet Pots & Grow ContainersGrow Mediums/ConditionersWater & Air PumpsIrrigation PartsGourmet SeedsMiscellaneous AccessoriesSH MerchandiseGrowing Information

GROW TIPS NEWSLETTER

Join our GROW TIPS newsletter to receive occasional growing tips and methods in your email. We also take customer inquiries from through out the week and compile them in our newsletters so everyone can benefit!

CHOOSE YOUR CURRENCY U.S. Dollars
 

Roseman

Elite Rolling Society
We have done tests and the chlorine dissipate within minutes from the tap, especially if you runt he water over the warm part of the palm of your hand. DO NOT ADD ANYTHING TO DO AWAY WITH THE CLORINE.. Do not use water that sat out and uncovered or was stored.
.
pH Problems
If you have a PH problem, you simply did something wrong. You should make sure that the PH of the water going into the tank is very close to 6.2. Anything between 5.8 and 6.8 is OK, but 6.2 works best. When you first set up your tank, you should do a PH test on your water before adding the water to the tank, using the enclosed PH test strips. Then adjust the water with PH UP or PH DOWN before it goes into the tank. That way, the PH perfect nutrients will work best. It can be dangerous to adjust the PH in the tank, especially if you overly adjust it. It is also dangerous to adjust it frequently. A very slight adjustment is OK, but if you change it drastically in the tank by using a large amount of PH UP or PH DOWN, you are taking a big risk of seriously harming your plants. If you do a test on your tank's water and it is extremely out of range from 5.8 to 6.8, then it is best to drain it and replenish it with PH corrected water and nutrients. (see the 8 Step Remedy) Let us repeat, you should add the nutrients to PH perfect water to start with. If you insist on adjusting it in the tank slightly, then use no more than 1/2 level teaspoon of PH UP or PH DOWN to the tank, and no more frequently than 4 hours apart. Plants do not adjust well to rapid changes in PH levels. The results can be Nutritional Lockout. Remember, if you make a mistake then you can easily and rapidly correct it, by using the 8 Step Remedy.

THE 8 STEP RECUPERATION AND RECOVERY REMEDY

1. Check the roots. If they are discolored, reddish or brown, or present an unpleasant odor, you have a problem. If they are weak, soft or mushy, you have a problem. Also while checking the roots, observe the temperature of the water. If it is warmer than "luke warm" you have a problem. This problem is probably what is referred to as "root rot" or a disease known as PYTHIUM. Remove the dead brown roots by trimming them away with sharp scissors. Do not leave them in the tank.
2. Check the humidity and temperature of the grow area below the lights in the "growing zone" when the lights are on. A temperature of above 82 degrees or below 67 degrees will slow growth, but it is not a serious problem that will kill your plants. Temperatures below 62 degrees or above 90 degrees will stop growth. An extremely high temperature in the upper 90s or below 58 degrees can slowly result in death of your plants. The most efficient temps for growth are between 72 to 80 degrees. Any Humidity between 40 and 60 percent is acceptable and desirable.
3. Check the "lights off, nighttime" temperature. Most desirable is ten to 15 degrees cooler than the daytime "lights on" temperature, averaging 66 to 70 degrees.
4. Check the distance between the tips of the plant and the tip of the light bulb. If you observe yellowing or leaf curling tips, then move the lights one inch further away. A good rule of thumb if you use HID lights, is hold the soft palm of your hand at the leaf tip and see if the bulb is too warm to your hand. If you use Stealth Hydro's compact fluorescent bulbs, we recommend a distance of three or four inches for the 65 and 85 watt bulbs and 4 inches to five inches for the 105 watt bulbs. More mature plants can handle the bulbs slightly closer.
5. Check the position of your fans. Air movement is very necessary for the health of your plants, but too strong of a fan can cause wind burn. Direct your fan toward the tops of the plants and toward the lights. Never position the fan blowing strongly downward on the leaves.
6. Add 1/4 teaspoon of hydrogen peroxide to a quart of water and add it to the tank of six gallons already in the tank. Wait ten minutes and then turn the water and nutrition solution pump off to prepare to drain the tank. Poor at least a cup of clean water through each grow cup, onto each rockwool cube and through the hydroton rocks.
7. Drain or pump the tank empty as possible without damaging the pump by running it dry. Add two gallons of additional clean water with 1/4 teaspoon of hydrogen peroxide again and then drain it away too. Again, empty the tank as empty as possible without burning up your pump.
8. Add fresh PH balanced water and nutritional packets as prescribed. PH test it again.

The above 8 steps should repair and remedy any health problems that your plants experienced within the next two days. Now is the time to try and determine what caused the problem to start with, by investigating and researching typical hydroponics problems and illnesses. Here are a few DIAGNOSIS TIPS.


Typical Hydroponics Problems and Illnesses

Underfeeding and Weak Nutrition
The entire plant, both upper and lower leaves, will show lime or light green in color.
The plant will not eat, drink or show growth.
It is time to follow the 8 Step Remedy.

Overfeeding, Use of Too Strong Nutrients
The leaves will curl downward. They grow very dark dull flat green and then the tips show signs of burn.
It is time to follow the 8 Step Remedy.

Nutritional Lockout
You know that you have made recent PH adjustments. You might know you may have used too much of the PH Adjustment Solution. You may have failed to test the PH often enough. You notice the plants did not eat or drink because they did not consume the same amount of water they used yesterday. You see rust spots. The large lower leaves are prematurely dying and you are not in the BLOOMING or FLOWERING stage.
It is time to follow the 8 Step Remedy.

Wind Burn
You had the fan blowing downward toward the upper side of the leaves, instead of blowing up through the node spaces or toward the lights. You observe the leaves becoming dry or even crispy, perhaps shriveling, and the tips curling upward. The leaves do not appear glossy, moist and vibrant.
It is time to follow the 8 Step Remedy.

Water, Nutrition Solution or Roots Are Discolored Brown Or Have an Unpleasant Odor
You notice your water is becoming brownish in color, or smells distasteful. Your solution does not smell pleasant and appetizing like fresh lettuce. Your roots are not the same shade of white that they once were a week ago.
It is time to follow the 8 Step Remedy.


PRODUCT CATEGORIESBubbleponics™ SystemsBubbleponics™ Combo KitsDWC Hydroponics KitsHydroponics ReservoirsHorticultural Light SystemsReplacement Light BulbsSeeding & PropagationIn/Outdoor Organic GrowingHydroponics FertilizersHydro Organic FertilizersOrganic FertilizerspH ControlElectronic pH MetersElectronic TDS MetersWater Filtration SystemsNet Pots & Grow ContainersGrow Mediums/ConditionersWater & Air PumpsIrrigation PartsGourmet SeedsMiscellaneous AccessoriesSH MerchandiseGrowing Information

GROW TIPS NEWSLETTER

Join our GROW TIPS newsletter to receive occasional growing tips and methods in your email. We also take customer inquiries from through out the week and compile them in our newsletters so everyone can benefit!

CHOOSE YOUR CURRENCY U.S. Dollars
 

stupidlizard

Active Member
maybe it was under nutrition. i only gave them 1/8 strenght at first now im at half. The roots are brownish in color but that might be cause they were started in soil. the new roots that are forming are white/clear though.
 

stupidlizard

Active Member
well I did some changes to the setup, I lowered the water level so that the roots are not submersed in the water thinking it would be better if they grew into the water themselves. There is lots of new root growth and all looks healthy white. I still have that gel like substance on the roots though. The leaves are still droopy but finally the top of the plant is showing signs of new growth. Hopefully things will continue to work itself out. I will post more pics soon.
 

stupidlizard

Active Member
today I got my tds meter and my solution reads 512 im gonna do some research and see where i want it. I ggot home yesterday to find that my water level got too low and the roots started to dry out. I lost 3 plants i think but the other 5 are looking ok. I transfered the 3 into seperate rockwool cubes and put them in my homeade propogater. I hope they bounce back.
 

Roseman

Elite Rolling Society
PPM for Hanna Chart PPM


Seedlings, Early Sprouts 100 to 250

Early Vegging 300 to 400

Full Vegetation 450 to 700


Early Blooming 750 to 950

Full Mature Blooms 1000 to 1600

Note: EC Calculations are different, here's a conversion chart :
heres a great chart that shows how different PPM can be from meter to meter... EC is the only real universal language...


stupidlizard

Active Member
thankyou very much. However I seem to have yet another problem. Heat. I am having a real hard time keeping the rez under 82 any suggestions?
 

Roseman

Elite Rolling Society
thankyou very much. However I seem to have yet another problem. Heat. I am having a real hard time keeping the rez under 82 any suggestions?

Blow a fan on it.

Take a gallon of water out and add a gallon of cool water back, daily.

Put a ice bag on top of it.

Cool the room.

GEt it down or you'll definitely get pithium. (root rot)
 

Roseman

Elite Rolling Society
VERY HIGH TEMPS stunt and retard growth.

Temperature
a copy and pasted article


Having a garden thrive indoors is an exceptionally rewarding experience. It is rewarding not only because of the outcome but because of the effort involved to actually have your garden succeed. Hobbyists and professional gardeners alike will tell you that when moving a garden indoors, the temperature is the hardest factor to take control of. When confined to a small space ballasts and lights can push temperatures sky-high in no time flat. This is especially true during hot summer months when outside temperature reaches its highest. Nighttime (lights out period) temperature can be just as difficult to regulate during cold winter month.
Most gardeners are aware that temperature in the grow room plays a major role and can greatly affect the growth of plants and the quality of the finished crop. Most gardeners do not know how controlling the temperature of their garden in very specific ways they can achieve a superior crop. Drift to far from these ideal temperatures and watch your plants and crop suffer. In part 1 of this article it will be explained why temperature is so important to the indoor garden and exactly what the ideal temperatures are. In Temperature and the Indoor Garden part 2 you will learn of some amazing products, new and old, that will help regulate temperature in the grow room. These products can save you, the gardener, time, money, and will help supercharge any garden.
Before getting started it is highly recommended that every indoor garden has a max/min thermometer. ($4.95 at Wlamert) This product allows the gardener to see exactly the fluctuations in temperature within their garden. Without this useful tool there is no accurate way of knowing the different temperatures between daytime (lights on) and nighttime (lights off). The difference between the two temperatures is very important to plant growth. Anymore than a 10F-15F difference between daytime and nighttime temperatures and you risk shocking and stressing the plants. In general the optimal daytime temperature for plant growth is between 70F -75F. Drift to far above this range or too far below and growth can be severely affected. Daytime temperatures exceeding 90F or under 62F and plant growth will be stunted. If the temperature drifts higher than 95F the plant’s enzyme production will drop off and the plant will begin shutting down. At temperatures that high photosynthesis shuts down due to the stomata in the leaves closing down to conserve water. At normal temperatures the stomata will be open, taking in CO2 and sweating water to keep the plant cool and allowing for transpiration.
These temperature ranges will vary depending on variety and species of plant. For instance, some orchids require more than a 10F-15F difference between daytime and nighttime temperatures in order to flower.
Ideal temperature also varies depending on whether or not CO2 is being introduced to the environment. A more suitable daytime temperature when the air is being enriched with CO2 is 80F-85F. This temperature range promotes the exchange of gases between the plants and the environment. Also, it can speed up the process of photosynthesis. Plant in an environment at 86F an perform carbon extraction from CO2 twice as fast as at 68F. It is still recommended that the nighttime temperature drop no more than 15f from that of the daytime temperature. There is another relationship between temperature and the absorbsion of gases by plants that many hobbyist growers are aware of. That is the relationship between the temperature of the water in your reservoir and the amount of oxygen the water can hold. The best range that your reservoir can be between is 60F-75F. Ideally the reservoir temperature should be at 65F because this level contains the most oxygen. Also this temperature will help control transpiration (the act of drawing up nutrients by evaporating water through out the leaves), and humidity levels. Buying a simple floating thermometer will allow you to know where you fit in this range.
Another great reason for regulating the temperature in your grow room s that biological processes can be speed up exponentially by every degree. This is true for your plants as well as the potential pests that may invade your grow room. Pests such as spider mites can reproduce up to 10 times faster with every degree the temperature rises. These pests can destroy a garden in no time flat, you really do not want to make it any easier for them. With a daytime temperature at a steady 72F and nighttime temperature of 65F it is much easier to control and destroy spider mite, thrip, and many other pest populations.
The same principal can be applied to the prevention and control of fungi, molds, mildews, and bacteria, which can spread more rapidly when temperatures in the grow room or reservoir exceed 90F. Also, the warmer the air, the more water it can retain which means humidity levels can easily go beyond the recommended 40-50%. This high humidity coupled with lower nighttime temperatures can cause condensation to form on leaves. This will invite molds, mildews, fungi, and bacteria to take over you grow space. With high temperatures the likely-hood of losing control of the problem, such as powdery mildew, is very high. Once control is lost your plants may be the next to go.

Temperature is also very important when it comes to starting seeds and getting cuttings to root. Placing seedling trays on a heating mat will reduce germination time dramatically. Speeding up germination time usually leads to stronger and healthier plants. Also, less time spent between crop cycles makes a garden efficient. More harvests provided in less time can equal big bucks in the pockets of professional growers.
The ideal temperature to achieve these results is 80F. Any higher and you risk burning the roots. Also, many seeds simply will not germinate at temperatures over 90F. The seeds will become dormant and never sprout.
The same principal used for seeds is used on cuttings to coax roots out quicker. The sooner cuttings can establish roots the better. If roots can be forced quickly they will grow strong and stay strong. A bottom temperature of 80F-85F, roughly 10F warmer than the air, will speed up rooting time and help to jump start those roots once they do begin. Let the temperature get too high or too low and roots growth will be hindered or they will never grow at all. Using the proper technique and the proper temperature for bottom heat not only can rooting time be speed up from 2 weeks to as little as 3 days, but the survival rate of your cuttings will drastically improve.

On the topic of roots, there is an ideal temperature for the root zone after the plants’ roots have been established. Roots are working 24 hours a day and constant attention is required concerning temperature in and around the root zone. The ideal temp for this root zone is generally 75F. At this temperature the ion exchange between the roots and the environment around them is at its absolute best. This means that the plant’s root system can take up more macro nutrients, more micro nutrients, and more oxygen at this temperature than at any other level. This makes a plant more efficient and a plant working efficiently will provide a superior yield.
 

stupidlizard

Active Member
wow thankyou very much for that info. I am currenty looking into ways to maintain the temp like turning plants off at 2 pm and turning them on at 6 pm that way they are not on when the sun is hitting that part of the house, thus not as hot. I have done that yesterday and today and the temp never went above 80 and never below 70. So I think by adjusting the time will help for now but when summer hits im gonna have another problem. On a positive note i got my vaporizer today and it is awsome. I took a bud off of another plant that is close to finishing and the vaporizor did its job right away and man it is some potant smoke. Im not sure what the strain is cause it was a free seed from a seed bank but man it will be excelent in a few more weeks.
 

stupidlizard

Active Member
hello again sorry i havnt updated this. I have been batteling the brown algea and also root rot. I bought another tub this one is a 27 gallon and is a better tank i think. I will post pics. I switched all 10 plants last night and I used the 8 step recovery on the 5 plants that were in the bad rez. The other 5 look perfectly healthy. Now The water temp is staying at about 65. ph is 5.5. and tds is 676. I have 2 12' airstones in the bottom of the rez they are giving me lotsa bubbles. well i cant figure out how to add pics to this but they are in my album if you wish to see.
 
Top