Immature587
Well-Known Member
i'm going to turn my grow room in progress into a quick how to for first timers.
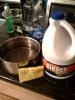
list of materials:
2 x sunspot 6 HID reflector Air Cooled
2 x Hortilux Enhanced Spectrum 600w HPS bulb
2 x Lumatek Electronic Ballast 360/400/600/Super Lumen
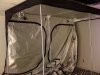
1 x 4x8 Secret Jardin Grow Tent
1 x Active Air 6" In-line Fan 400cfm
also:
assorted pots
fox farm ocean forest organic soil
fan
rapid rooter tray
humboldt nutrients
6" inch flexible ducting
***not everything is in this first picture obviously.
****this list will grow over the next couple of days as i go buy more stuff to finish the room
list of materials:
2 x sunspot 6 HID reflector Air Cooled
2 x Hortilux Enhanced Spectrum 600w HPS bulb
2 x Lumatek Electronic Ballast 360/400/600/Super Lumen
1 x 4x8 Secret Jardin Grow Tent
1 x Active Air 6" In-line Fan 400cfm
also:
assorted pots
fox farm ocean forest organic soil
fan
rapid rooter tray
humboldt nutrients
6" inch flexible ducting
***not everything is in this first picture obviously.
****this list will grow over the next couple of days as i go buy more stuff to finish the room
Attachments
-
 188 KB Views: 18