Tyrannabudz
Well-Known Member
Hello everyone and welcome to Grow Room Renovations. I recently enlarged the size of my flowering room and built an all new much larger veg room to accomadate the growing demand for high quality medicine.
Originally my flowering room was 6'6"x 5'6" with a ceiling height of 7'9". The veg room was 7'6"x 3'5"x 7'9".
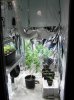
The veg room was constructed like a hallway, it was deep and narrow. It was sufficient enough to grow small veg plants to a height of about two feet in 3 gal containers. I could squeeze about 15 3 gal pots in the small area but the light would not get good penetration through the dense foliage because of the tight spacing. So it was decided that a larger veg room was necessary to help the plants thrive by giving them the space they require.
The flower room was a good size. I could easily put those 15 vegging plants to flower in there without any space issues.
The problem that arose was access to the plants at the back of the room. I grow in soil and water each plant individually so getting in there to water the back plants was a chore. I would have to take the first couple rows of plants out of the room completely just to allow access. A change in this room was also in order.
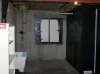
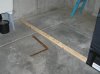
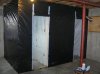
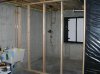
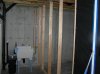
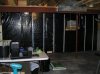
The rooms were originally constructed right next to eachother. Utilizing 2x4's for wall construction and plastic sheeting for room separation. There was a single 2x4 framed wall dividing the two rooms. The plan was to remove this wall which would in turn make the two rooms one big room, which would become the new flowering room. An all new room for veg and clones would be constructed next to it. The measure ments for each area are now,
Veg room: 6'6"x 7'8"x7'9"
Flowering room: 6'x 10'x7'9"
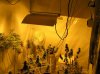
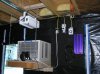
I considered purchasing a new light to add to to the 600w Adjust a wing reflected light I have now, but due to budget constraints I opted for a light mover instead. A Gualala Robotics light rail 3 with 6 rpm motor and 6' rail fit the bill nicely.
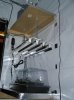
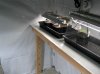
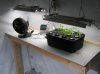
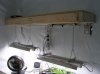
For the veg room I utilized my existing 400w Sun System Super Sun reflector which will be more than sufficient for my new veg room. For clones I constructed a bench out of 2x4's and 1/2"mdf. With an upper shelf in which my four t-5 lights would hang from to illuminate my clones.
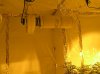
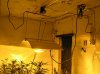
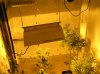
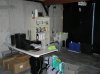
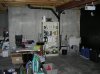
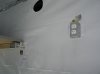
Below are some before, during, and after pics to show the process that was used in this renovation.
Originally my flowering room was 6'6"x 5'6" with a ceiling height of 7'9". The veg room was 7'6"x 3'5"x 7'9".
The veg room was constructed like a hallway, it was deep and narrow. It was sufficient enough to grow small veg plants to a height of about two feet in 3 gal containers. I could squeeze about 15 3 gal pots in the small area but the light would not get good penetration through the dense foliage because of the tight spacing. So it was decided that a larger veg room was necessary to help the plants thrive by giving them the space they require.
The flower room was a good size. I could easily put those 15 vegging plants to flower in there without any space issues.
The problem that arose was access to the plants at the back of the room. I grow in soil and water each plant individually so getting in there to water the back plants was a chore. I would have to take the first couple rows of plants out of the room completely just to allow access. A change in this room was also in order.
The rooms were originally constructed right next to eachother. Utilizing 2x4's for wall construction and plastic sheeting for room separation. There was a single 2x4 framed wall dividing the two rooms. The plan was to remove this wall which would in turn make the two rooms one big room, which would become the new flowering room. An all new room for veg and clones would be constructed next to it. The measure ments for each area are now,
Veg room: 6'6"x 7'8"x7'9"
Flowering room: 6'x 10'x7'9"
I considered purchasing a new light to add to to the 600w Adjust a wing reflected light I have now, but due to budget constraints I opted for a light mover instead. A Gualala Robotics light rail 3 with 6 rpm motor and 6' rail fit the bill nicely.
For the veg room I utilized my existing 400w Sun System Super Sun reflector which will be more than sufficient for my new veg room. For clones I constructed a bench out of 2x4's and 1/2"mdf. With an upper shelf in which my four t-5 lights would hang from to illuminate my clones.
Below are some before, during, and after pics to show the process that was used in this renovation.