No more tests and modifications folks, this show is on the road.
My rockwool had been soaking for 24 hours, so I figured it was as good a time as any to plant my little sprout. I checked on her and saw that the tap root had at least doubled in length in the last few hours, and was now probably over 1/8". Yep, we're ready.
View attachment 1122157
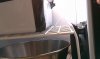
I cleaned out my reservoir and got set putting together my first batch of nute solution. I decided to use 2L of solution (just over .5Gal) because metric units are easier to use with my measuring dropper. I added the recommended .66mL of each of the three General Hydroponics nutes (FloraMicro, FloraGrow and FloraBloom) for seedlings, and then prepared my net pot with a little base of hydroton. I squeezed out my soaking rockwool and dipped the top in the fresh nutrient solution to dampen it. Placed it in the net cup, filled up the rest with more hydroton, and put the whole contraption in my grow case. I then used a pair of sterilized tweezers to transfer the sprout from the germ plate to the rockwool. I got it oriented, and then ripped off a little piece of the corner and put it over the top of the little hole I had created. Power on.
View attachment 1122159
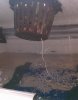
Looks good, no?
")
I'll keep an eye on her over the next few hours to make sure the rockwool isn't drying out that close to the lights. It should stay pretty well hydrated from the bubbling water and moist hydroton, but I'll check a few times to be safe. I hooked my lights into a timer which I am setting for 20/4. I am choosing to have it off for the four hottest hours of the day (1-5PM) because it is still sort of warm outside and I don't have an AC.
In other news, I ordered two nice HM digital meters today; one for PH and one for PPM. I'm also going to be putting a CO2 production bottle in the case in the next day or two. I think this will couple really well with my slightly high temperatures and low/med humidity.
I just ate a popsicle and it had quite possibly the lamest of any popsicle joke I have seen in a long time: Why was the colt laughing? It was a little horse. What...? That doesn't even make sense? I understand that they're making a pun about the colt's stature, but horse? Why would you be more likely to laugh if you were horse? I would think it would be the opposite... Hum. Dum dum.