FeralAgrarians's 600W MH FF Soil Mix - First Grow

FeralAgrarian

Active Member
Welcome to my first grow journal. I’ve read many books, forums, articles, and blogs about growing and I’m finally able to have a grow of my own and I want you to follow along, ask questions, and contribute in a positive and/or constructive way in case you think I’m getting off track.


Strain: Nostalgia (Hybrid, 19 years in our family)
Origins: Speculative (Hindu Kush x Jack Herer x Hash Plant)
Flowering Lights: 600 Watt Metal Halide
- Air Cooled Hood designated intake and exhaust with 6” inline fan
- electronic ballast situated outside of grow room
- 12/12 timer
Grow Method: Soil mix, Scrog, Low Stress Training, Defoliation
Air:
- Passive Intake
- 305cfm Axial Fan with Carbon Filter Exhaust hooked up to a Temperature controller set to 75 degree F
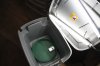
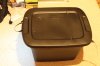
Grow Container: 2 gallon smart pot with tray, bottom of pot layered with fine perlite just enough to cover the whole bottom
Grow Media mix:
Fox Farms: Ocean Forest
CannaCoco: Coco Coir
Fine Perlite
Great White Mycorrhizae

I cannot give the ratios because of a confidentiality agreement. It’s ordered from most to least though and a little experimentation can get you pretty close.

Grow Room Dimensions:
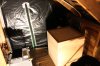
This is the tricky part. It’s in an awkward empty space in the attic between a bedroom wall and the attic wall. The ceiling is slanted as the roof is.

Length x Width x Height:
96” x 51” x 34” minimum - 71” maximum

I can write up a post about how I set up this awkward room up if I find enough interest in it. I have pictures just in case.

How I will organize future posts:
  1. Early Vegetative
  2. Late Vegetative
  3. Early Flower
  4. Late Flower
  5. Final Phase
  6. Flush
  7. Harvest
  8. Dry
  9. Cure

My goal is 280 grams minimum up to around 500 grams dry. I’m estimating conservatively because of the MH, new environment, undocumented strain, and my lack of experience. I want to get a gram per watt (600 grams) so I can join the club and be a cool guy, but I am also realistic and mildly conservative when I estimate.


Enjoy!
 

Attachments

FeralAgrarian

Active Member
1. Early Vegetative

Lights: 2 x T5 6400K single bulb lights at 12”
- on 24 hours
Starting status: received clones as gift, 4” tall, well rooted with 5 or more roots showing, slight frost damage and shock from winter transport, believed to be 3 weeks old
Media: Jiffy Pellets
Grow container:
Storage bin, no holes, lights ziptied to lid, outside painted black for light protection
IMG_2028.JPG IMG_2029.JPG IMG_2030.JPG
Environment:
- Temperature: 75-85 degrees F
- Humidity: 80 - 100% RH
- Heated with seed mat at first then switched to space heater which was sat on top of box made to blow into the grow room in which the storage box with seedling sat. This leveled out the temp, but still tweaking
Watering: No need for watering, I believe they were in shock for about 2 days, then the jiffy pellets started to dry out on day 3, on day 4 I decided to transplant because most of the jiffy pellets were moderately dry and I water generously on transplant day

Summary:
Time In Early Vegetative:
3 weeks, 4 days
Growth: about 3.5” from 1.5” cutting length - 5” in jiffy pellet
Pests: some green mould on some pellets, I may not keep them but gifter says it’s common and it hasn’t hurt his crop in the past, I am leery anyway.

Lessons Learned:
- Didn’t need to paint storage bin for light protection because I didn’t end up keeping it in my bedroom as planned and won’t be keeping it in the grow room later because it is too small to even fit a clone dome with tray into it.
- Seed mat I used was unreliable as it was rated at 80 degrees, I kept finding my bin around 85+. I donated it to a good cause.
- Now that I have the ability to make my own clones from a mother plant, I will be plan to shorten early vegetative phase if possible, or grow bigger plants in 3 weeks

Note:
I didn't take pictures of these plants until the next stage, I decided to start this journal a little further in the grow and retrospectively recreate it with my notes. I wish I took pictures from the very beginning now.
 

FeralAgrarian

Active Member
2. Late Vegetative:

Lights:
2 x T5 6400K single bulb lights at 12”
- on 24 hours
Grow Media: Soil Mix
- FFOF
- CannaCoco: Coco Coir
- Fine Perlite
- Great White Mycorrhizae
Grow Container: 18oz solo cup with 4 slits cut in the bottom for drainage
Grow Enclosure:
- Upgraded plastic storage bin with lid
- not painted
- 1 ¾ inch holes cut in sides and top for mild air exchange
Temperature and Humidity:
Inside Bin: 70 - 80 degrees F // 60 - 80% RH
Inside Grow Room (ambient to Bin): 70 - 85 degrees F // 20% RH
Attic (ambient to Grow Room): 55 - 61 degrees F // 20% RH
Watering: using the feel-it, and if its light, water-it method
- unfiltered, non-PHd, unknown TDS, tap water from a well
- once dry after transplant, watering usually happens around every 2-3 days
Air Movement - just a clip on fan to keep grow room consistent temp and hopefully encourage minor air exchange between storage bin and grow room through drilled holes
Pests: green fungus now found on surface of 1 out of 3 clones originally infected. It seems to have made the perlite on top of the surface turn green, but no indication in harm to growth rate

My Transplant Method:
  1. Mix up soil-mix - leave it dry, do not add water to it yet
  2. Count out the number of plants that need transplanted (10 in this case)
  3. Separate out 10, 18oz solo cups from the package
  4. Write out the strain name on each cup in sharpie marker (abbreviating to either 2 or 3 letters on 2 sides of cup)
  5. Using a pair of shears or trimming scissors, cut 4 small slits in the bottom “corners” of each cup for drainageIMG_1995.JPG
  6. Layer the bottom of each cup with about ¼” of fine perlite for drainage (basically enough that you cannot see through it to the bottomIMG_1997.JPG
  7. Fill cup just enough that when I pack it down lightly, and set the jiffy pellet on top, that the top of the jiffy pellet is about ½” below the top of the cup.IMG_1998.JPG
  8. Set rooted clone in jiffy pellet on top of soil mix
  9. Using an empty solo cup, scoop up some soil mix and sprinkle around jiffy pellet inside the cup insuring to pack soil in around it just enough to prevent air pockets;
  10. I make sure that theres at least ¼” of soil mix on top of jiffy pellet because when I water, it compacts a little bit and I just don’t like the pellet exposed to the air, if it is, it doesn’t much matter, but I tend to keep an eye on the ones with exposed starter cubes or pellets because they dry out faster for me.
  11. Then I set all the cups inside of a water tight tray, and pour water at an average pour pace (not too slow, not too fast) over each cup until the water hits the brim
  12. I wait until the water level lowers, soaks in, and starts to flow out of the bottom (about 1 - 2 minutes)
  13. Then I go around once more and fill each cup to the brim with water (tap water) (I recommend pHing the water to around 6.2 though, I just wanted to prove a point to a friend that pH doesn’t matter as much doing it this way for the first water)
  14. I let the cups drain/soak up that excess water for about 5 minutes before bouncing them a little bit, and placing them in the storage bin for their next stage of growth

I waited about 7 - 10 days before the first cup became dry enough to have its first water after the transplant

Current Status
Time in Late Vegetative Stage: 1 week 3 days
Growth: 4.5” from 5” to 9.5”
IMG_2042.JPG
 
Top