Dozers Secret Hydro Lab: Part Deux

d0z3r

Well-Known Member
Hello again boys and girls!
D0z3r here.
After a short break, the bat cave will again be fully operational. This time around, I did about $60 worth of upgrades to my system, hoping to increase yield, and energy efficiency. I will not go over the construction of my hidden growroom, as I covered that in my previous grow journal: D0z3r's First Hydro.

In a nutshell:
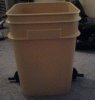
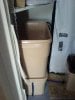
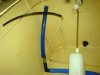
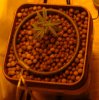
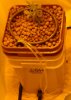
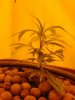
I will be using a 600W switchable Galaxy Ballast with a hortilux MH for the veg cycle, and switching to a hortilux superHPS for flowering. I have a 6" inline vortex exhaust fan connecting a 6' Sun Master air cooled reflector to my 6' carbon filter can fan for exhaust. The system itself is a modded General Hydroponics Waterfarm. I'll be using the Sensi Grow A&B formulas for the veg cycle, and Connoisseur for bloom.

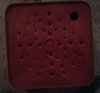
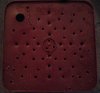
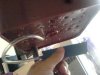
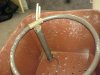
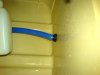
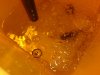
In my next post. I will detail the modifications I made to improve on my General Hydroponics Water Farm.

Stay tuned.....

D0z3r
 

d0z3r

Well-Known Member
On my last grow, the roots clogged up one of my pots. I was unable to seperate the pots to drain just one, so I ended up having to lift out the top pot with a 4' plant inside and while dripping everywhere, drill more holes in the bottom of the pot. This was not fun. This time round, I've decided to perforate the bottom of the top pots with more, bigger holes. I used a 7/23" plastic bit to do the deed.

Before:
dsc00118.jpg
After:
dsc00120.jpg

When I had the top pot suspended, I noticed that lots of the roots hanging into the bottom were black and smelly. Root Rot. At the time, all I could really do is add peroxide to treat the problem. This time round, I have added an air stone to each of the pods to oxygenate the water beneath the plants so when the roots hang down into the solution, they'll be able to breathe. I'm hoping this measure will introduce some PH stability as well.

dsc00121.jpg
I ran the tubing up through the bottom of the top pots and attached the tubing to the drip ring assembly using Bonsai training wire.
dsc00122.jpg

To allow for emergency maintenance, I added 1/2" inline cutoff valves between each of the major components, allowing me to isolate and drain any errant components without affecting everything system-wide. This will hopefully also allow me to investigate PH problems in individual pods by cutting off the external water supply and measuring the pods individually.
dsc00123.jpg
dsc00125.jpg
dsc00129.jpg
dsc00131.jpg
dsc00133.jpg

Once that was done, I filled everything with hydroton, and filled the system with plain tap water to check for leaks. (also, the chlorine will help to sterilize everything while I'm completing finishing touches.

I think the cave is ready for some clones! I still haven't decided on strain. Maybe Warlock? Sour Diesel? PPP? Hmmmm... Decisions Decisions.

This journal is intended to educate and inspire conversation. Please feel free to discuss, offer advice, or ask questions about anything you see here. As long as it's on topic, it's fair game.

Stay tuned....

D0z3r
 

Attachments

d0z3r

Well-Known Member
Adding the cutoff valves has already saved me loads of trouble!
I filled the system last night with 10G of plain tap water to check to make sure all of the gromits(sp?) and valves were water tight. Everything looked great until I checked on things the next morning. One of my seals has a slow leak. Previously, this would have meant spending most of my morning emptying ten gallons of water and probably being late to work as a result. Since I now have valves, only the malfunctioning pod had to be drained(~1.5G). Having a couple of extra pods around was also nice. I replaced the pod, grommit, and added a fresh section of hose. Now everything seems to be watertight. Total time: 15 minutes.

And D0z3r was pleased with his creation....
:)
 

caddyluck

Well-Known Member
hell yeah! looks good buddy, are you going to add a big-ass airstone for the controller or res too? are you useing the pump that came with the water farm to run all air lines? I never said it before but the closet is just sick....I had to say it. :)
 

JayDRO

Well-Known Member
i would like to see you grow a strain from reserva privada or dna genetics if thats possible. anyway, im subscribed.
 

JakeStoner

Active Member
Yeah man it looks freakin sweet!!! I like your creative modifications to your system. Thats why I enjoy growing so much, to be able to design things to constantly try and increase effectiveness and increase yield!!! I'm looking forward to seeing more!!
 

d0z3r

Well-Known Member
After careful deliberation, I have decided on AK-47 for this grow.
I'm a big fan of the AK, and I'm anxious to see what a little T.L.C. and a little scientific curiosity can do for this amazing strain.

For the first fill, I filled the lower system with PH balanced, plain tap water.
Once the lower system was full, I turned off the cutoff valve attached to the reservoir, and filled the reservoir with 10gallons of water. To that, I added 20ml of Sensi grow A + B(40ml total), 40ml SensiZYM, and 20ml of Mother Earth Tea. This brought the PPM in my reservoir to about 700, adjusted for the PPM already present in my tap water. Once that was ph balanced at 5.6, I re-opened the cutoff valve, allowing the goodness to flow only after it's been completely mixed up. At present, PH is steady at 5.9. A little high, but not high enough to adjust just yet.

Anyways, here are the baby pics. Aren't they Cute!
dsc00141.jpgdsc00142 - Copy.jpgdsc00142.jpgdsc00143.jpg
 

zeke907

Well-Known Member
Lookin good bro. Great choice of clones, I love some good AK47. The stuff I see in the clubs here is well... Shitty. AK is a beautiful strain and plant, and for it to look the way I have seen it, its a shame. Maybe it was outdoor, or the grower was rushed or something. It just didn't look or live up to the name, the high was nice, but I know it could have been great, like AK is supposed to be. Again I'll say sick setup, and your mods to the WF is SICK!!!! I'll be posted for this go round. I have clones from my first batch waiting for these to finish. Then I'll grow those out and then Ima try 12/12 from seed. lol. Peace.
 

d0z3r

Well-Known Member
Thanks for the encouragement everyone!

West: I'm thinking about applying some decorative Bonsai pruning techniques to this grow. Last time I topped then FIMed, and I ended up inadvertently creating a blackout canopy(it was pitch black below the top layer), and reducing my yield in the process. The problem is with the limited room I have to work with, canopy foliar density has to be proactively managed to allow for light and airflow penetration. I'm thinking about using what I've learned shaping bonsai to create a 'teired' canopy by pruning any parallel foliage in a spiral pattern. In theory, as long as I keep it to one spiral per plant, each stem in the spiral will have it's very own "airspace" to reach for the sky without bumping into any other stems on the way up. Also, I'm thinking about pruning off all growth 5-6' up the plants to allow for airflow and maintenance.
 

d0z3r

Well-Known Member
So it's the end of week one, and again, heat is my number one nemesis!
It stays about 90F in the grow space throughout the day, and that's using the HPS. the MH is significantly hotter! As such, I've had to adjust some operational details around a bit. For starters, the big, black fan is now on high, and constantly running air over my bebes, hopefully allowing them to aspirate more efficiently. That's the theory anyway. Additionally. I've increased the distance from HID to bebes to about 28 inches instead of 24. Recognizing the loss of light efficiency, having to raise the lamp really sucks. Unfortunately, it's pretty much going to be like that as long as I keep it on a 24 hour light cycle. I've been toying with the idea of going to 18/6 and keeping the lights off between 10am-4pm, the hottest hours of the day, but I'm not sure the temporary lower temperatures are going to make up for the loss of photon absorbtion. I just hate to see my little girls stressing. They're not too bad now, but if they start heat stressing any harder, I may have to figure out another option.
 

d0z3r

Well-Known Member
West: That's good advice mate. I'm thinking about cutting them off from 10AM-4PM(18/6) to have them off during the hottest part of the day. Probably going to do that tonight.

=)
Jaydro: Yep. I have a 6" inline 450CFM exhaust running through it.
 

hugetom80s

Well-Known Member
I always veg at 18/6. Partly because I've heard it's better than 24/0 from a lot of different places, but mostly because things just need a chance to cool off.

Let's see some updated pics buddy!
 
Top