neversummer28
Well-Known Member
Please do not post until you see some half-baked m&m's.
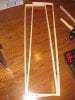
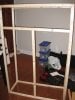
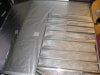
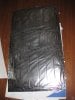
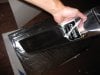
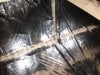
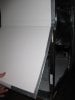
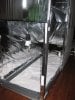
Here are the details to a grow box (actually, more like a cabinet) that I just built to house my second grow. Other than the dimensions, much of this design is modeled after my first grow box, which resulted in success considering it was my first grow. I figured I would put this out there for anyone looking to get ideas for building a budget grow box that will fit in a closet. I won’t go into details for everything, but hopefully still enough so that a few of you can walk away with some ideas. I also won’t go into details about the lighting, as that’s not really the point of this grow. But I will provide some info about my lighting set-up at the end.
The dimensions of the box may seem a bit awkward, but the shape allows me still use the closet for storage, as well. I did not have to buy too many materials since I had much of the below lying around the house. I’ve also included some prices (estimates).
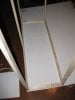
Materials:
- Wood -$20
- Poster board - ?
- Duct Tape - $6
- Reflective Duct Tape - $6
- Aluminum Foil - $4
- Foil Tissue Paper - $8
- Screws - $4
- Nails
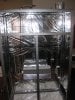
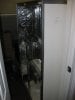
Box Dimensions:
5’6” tall, 3’8” wide, 15” deep
Plan is to house 3 plants in this box.
Here are the details to a grow box (actually, more like a cabinet) that I just built to house my second grow. Other than the dimensions, much of this design is modeled after my first grow box, which resulted in success considering it was my first grow. I figured I would put this out there for anyone looking to get ideas for building a budget grow box that will fit in a closet. I won’t go into details for everything, but hopefully still enough so that a few of you can walk away with some ideas. I also won’t go into details about the lighting, as that’s not really the point of this grow. But I will provide some info about my lighting set-up at the end.
The dimensions of the box may seem a bit awkward, but the shape allows me still use the closet for storage, as well. I did not have to buy too many materials since I had much of the below lying around the house. I’ve also included some prices (estimates).
Materials:
- Wood -$20
- Poster board - ?
- Duct Tape - $6
- Reflective Duct Tape - $6
- Aluminum Foil - $4
- Foil Tissue Paper - $8
- Screws - $4
- Nails
Box Dimensions:
5’6” tall, 3’8” wide, 15” deep
Plan is to house 3 plants in this box.