Covert newb grow Journal

ALuckyShot

Well-Known Member
Hello all, I am new to Rollitup and just started my first grow closet. Unfortunately due to my situation and limitations I had to go small and covert.

A week and a half ago my room mate said he could get clones from the guy where we usually pick up from. This guy is no doubt like the rest of you a real connoisseur of pot! I had always wanted to try and grow my own so we grabbed a couple of plants and decided to give it a go.

So we get these healthy clones that end up living in the window for a week, then under a single T5 HO fluorescent. I need to grab a digital camera quick and post some pictures for you all to see, it is always fun to laugh at newbies. Needless to say these plants took a real shit kicking. I will honestly be surprised if the mixture between lack of light, crappy water, bad soil, and a transplant doesn't finish them off.

What sort of grow journal is this? You marijuana killing SOB!! Don't worry I am a newbie but with the help of this site and others like it I have dramatically increased their chances for a full recovery!

I need this grow area to not look like a grow area so I gutted an armoire / dresser. Sneaky! Then proceeded to plaster the inside with a layer of plastic, followed by a layer aluminum foil. For grow lights in this cabinet I have mounted 16 X 2' T5 HO fluorescents for a combined 34500 lumen in a 3.75 sq ft grow area. Currently running 6500K lights but I will change bulbs out come flowering time.

I had always wanted to grow with hydroponics so for this little setup I made an ebb & flow system. I have a 15 gallon reservoir (fish tank with sides covered) that floods an approximately 9 gallon plastic storage container. I was torn on grow medium and decided on expanded clay pellets in mesh containers.

So now it is a waiting game, I will post pictures very soon, besides the two dying clones (lets hope it changes with the improvements made) I germinated 3 seeds the other day and literally since getting them in the dresser today I have seem them grow from under the dirt to an impressive 6mm above the soil.

Any advice or questions are appreciated as I am very new to this.

My two biggest problems are PH level and two dying clones :spew:
 

ALuckyShot

Well-Known Member
A couple things before I embarrass myself with the pictures promised! I know I need to lower my canopy lights, I honestly blew all my available funds until Wednesday so until then the plants have to deal with it :(

For nutes I am using pure blend pro grow, organic veg formula, and I am aerating the reservoir with a couple 6" air stones.

The dresser isn't quite finished, besides the canopy height there are way too many cracks allowing tons of light to escape and cause it too stand out.
 

Attachments

Last edited:

ALuckyShot

Well-Known Member
Today I spent some time re-wiring the lights. The original setup was not thought out overly far before jumping into construction. My main concern was just getting it together and making it work, now that it seems to be working correctly it is time to finish with all the little touches that will make it perfect!

The fluorescents I am using are able to have up to 8 of them linked together. To keep with the covert idea the re-wiring today lowered the amount of power cables coming off the back of the dresser from 11 cords to 6 cords. This is going to make it easier to conceal them and allows me to remove an entire power bar from the setup.

(electrical advice for anyone doing a ghetto home grow) If you are going to re-wire anything know what you are doing. I.E. today I had to extend the link cables that came with lights to various lengths. I used butt connectors, crimpers, an exacto knife, and electrical tape. I know it is nothing impressive but I am 110% positive that all my connections are solid and safe! No fires here!

I got my PH much closer to the optimal range than when the poor plants went for their first hydroponic drink. Currently pushing around 5.5 which is as accurate as I can be with my crappy little pool test kit.

The poor dying clones seem to be doing better already, nothing substantial to note about them except they certainly aren't getting any worse and I have noticed some new growths that look pretty healthy.

To do list:

1. Lower light canopy, it is much too high causing severe loss of light / penetration on the plant canopy.

2. Mount and conceal power bar / power cords. - Done

3. Purchase a second timer to place lights on auto on / off cycle. 18 / 6 veg cycle.

4. Purchase a larger air pump, aeration is occurring but not as much as I expected with two stones.

5. Purchase more caulking & materials for covering light escaping from various cracks and cut holes.

6. Install a mesh drain cover on overflow, and inlet in the top tank.

7. Install an exhaust fan in such a way that a future carbon filter can be added when required.


To anyone else reading this, my biggest concern with the operation today is watering schedule. Any advice would be much appreciated. Info on tanks / pump to assist those who would assist me include the following. The pump is an Eco 264 GPH with an approximately 14" lift from reservoir to grow tray. My timer is a 24 hour timer but limited to half an hour on/off cycles. I am using expanded clay pellets as a grow medium.

My confusion comes from reading about waterings ranging from 4 times a day to 24 times a day. As of right now I am flooding the tray 6 times a day. Please advise :joint::peace:
 

Attachments

Last edited:

skiskate

Well-Known Member
You should take the aluminum foil down as that can burn the plant. Mylar will work much better, its the stuff on the inside of chip bags.
 

ALuckyShot

Well-Known Member
I will definitely look into it, thanks for the heads up! Any advice on watering? It is a good thing I like chips, I can slowly convert the aluminum to mylar!
 

ALuckyShot

Well-Known Member
Today was another busy day on the stealth cabinet. Still need some adjusting in order to not stand out in the dark but I am really quite thrilled with how it has turned out. While out at the hardware store today I inquired about Mylar but everyone seemed baffled so I just bought what I had gathered so far and left to get back to building.

- Lowered the light canopy, I probably should have gotten 16" chains instead of 12" but such is life if I really want to lower it more I will buy longer chains.

- Installed an exhaust fan in the cabinet identical to the intake fan, temps / air flow seem more than sufficient for such a confined space. Need to purchase digital thermometer etc to test temps and humidity.

- shortened waterings but increased them to 8 a day from 6, limitations between my two timers limit the precision of the watering schedule.

- Setup a second timer, now both the lights and sub pump are on a schedule. No more waking up early just to turn on lights.

- Covered various non reflective surfaces and cuts with reflective tape that blends nicely with the walls.

So todays question if anyone wants to offer help is why will the aluminum foil burn my plants? Is it just from the heat from the lights? I wanted to switch over to mylar but I didn't want to eat lots of chips today and the hardware store thought I was crazy.

On a good note got a couple seeds today apparently it is a mix between white widow and another type that I can't recall, I am going to save them for a bit and see how the 2 clones and 3 seedlings make out in the mean time.
 

Attachments

Last edited:

MrsMcGreggor

Well-Known Member
Aluminum Foil:
Aluminum foil is no more than 55% reflective - if used, make sure that the dull side is the one that is used to reflect the light. When it becomes creased its reflectivity is even lower (around 35%.) It is also very dangerous to use because it creates hotspots easily, is electrically conductive, and is a fire hazard when it is in close contact with HID lighting. Attaching this to walls is a pain and usually using aluminum tape or glue is the best way. This should only be used as a last resort, and even then its usefulness is questionable.

copied From Growfaq:
What reflective materials can I use for my grow room?


Contributed by: DaChronicKing
Submitted: 05-07-2003

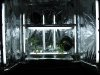
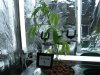
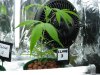
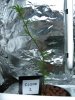
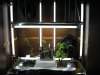
Choosing the right surface for the walls of your grow room is very important, as up to 40% of your total yield comes from the edge, and the right wall surface can increase the amount of light those plants receive by up to 30%! Artificial lighting diminishes exponentially with distance, so it is important to ‘contain’ as much of this light as possible, and direct it accordingly. Reflective surfaces also help illuminate the lower portions of the garden, providing lower buds with light and heat energy.

To get the best results with your light and walls, it is important to get the walls as close as possible to your garden to ensure the least amount of light is wasted. As a caveat, the percentages provided are only useful as a general guideline, as they present the range of reflectivity of the particular surfaces. The high percentage presents the best possible circumstances for that material (for example a 99% reflectivity rating for mylar sheeting would be under ideal conditions - no creases, completely flat, no discoloration, etc).

The best way to determine how well your grow room walls reflect light would be to purchase a light meter and measure your light directly; then take an opaque board and hold it a few inches off one of your walls with the light meter below the board in such a fashion that the light reflects off the wall and onto the light meter. You can then compare the difference between the two and determine a percentage from those numbers, the closer the two numbers are, the better your wall reflects light. It is important that in both measurements, your light meter is the same distance from the light, otherwise your results will be skewed.

Also important to note is that radiant light energy refers to electromagnetic (EM) radiation with a wavelength between 400-700 nanometers (nm) and radiant heat energy correlates to EM radiation with a wavelength between 800-2000nm.

Listed below are some of the most commonly used materials used for grow room walls:

Foylon:

A more durable version of mylar, made of spun polyester fabric and reinforced with foil laminate. Foylon is resistant to most solutions, won't tear or fade, and can be wiped or washed clean.

A great solution for growers who are interested in long term use, and though it may be slightly more expensive than mylar, its durability will more than make up for its cost. It has the ability to reflect about 95% of the light and approximately 85% of the heat energy, so a good ventilation system should be used in conjunction with folyon.

A recommended method to attach Foylon to the walls would be using Velcro, as it makes taking it down for cleaning much easier nd reduces the risk of tearing, creasing or bending it. If this is used for your walls, making sure you get it flush with the wall with no pockets of air between it and the wall to prevent hotspots.

Mylar:

A highly reflective polyester film that comes in varying thickness, the most common being 1 and 2 mm thick. The 2mm thick mylar while not quite as durable as the foylon, is fairly rugged. The 1mm thick mylar tears fairly easily, so taking it down for cleaning is quite difficult without damaging it in the process. Both types of mylar are able to reflect approximately 92-97% reflective, giving it the potential to be more reflective than foylon, but because foylon is more easily cleaned without damaging it as well as it being harder to crease, foylon usually ends up being slightly more reflective. Important to note is that mylar reflects radiant heat energy just as well as foylon (around 85%), so proper ventilation is necessary if mylar is used in your grow room. Attaching this to walls can be done in a similar fashion as foylon, and the same caution should be used to avoid creating hotspots in your room. The 1mm thick mylar stands a fair chance of being creased or ripped in the process unfortunately, even if Velcro is used to attach to the walls.

C3 anti-detection film:

A specialized type of mylar that exhibits the same properties as the 2mm thick mylar, but in addition to reflecting approximately 92-97% of the light, it also is 90% infrared proof, making your grow room all but invisible to IR scanning. This can also be attached in the same manner as foylon or mylar, and the same caution should be used to avoid creating hotspots in your room.

Flat white paint:

Self explanatory; a great option for large grow rooms or for people who are interested in a low maintenance wall. Flat white paint has the ability to reflect between 75-85% of the light, and does not create hotspots. Adding a fungicide is recommended when painting.

Glossy and eggshell whites not reflect light as efficiently as flat white. Semi-gloss paint for example, only has the ability to reflect between 55-60% of the light. Also important to remember when using paint is that any smears or blemishes on the surface take away from how reflective the wall is so care should be taken to avoid marking or staining the walls. Titanium white paint is very reflective; however it is usually only used on reflectors due to its high cost.

Elastomere paint (info by furun)

A rubberized roofing paint with 90% reflection. Good for growboxes. Mildew resistant. Highly reflective.

Kool Seal White Elastomeric Roof Coating ~ $15.00 (1 Gallon)

Ultra high reflectivity
Forms a rubber-like blanket that expands and contracts
Adheres to almost any surface (very good on wood and metal)
Available @ Lowe's Home Improvement: Buy Kitchen Cabinets, Paint, Appliances & Flooring

White/Black plastic (also known as panda plastic or "poly"):

"Poly" is useful if you are setting up a temporary grow room or don’t want to damage the walls. Poly is easily cleaned.

The purpose of the black side is to not allow any light to pass through the plastic, which ensures your dark cycle remains dark. The white side is 75-90% reflective. Choose a 6 "mill" thickness of poly for maximum light blockage and duribility.

If this plastic is put too close to the light, you will obviously melt it so be careful!. Panda plastic does not create hotspots. Poly can be attached to the walls by using carpenter’s nails or using tape glue or similar means. This can be used as a cheap alternative to mylar if painting your grow room is out of the question.

Polystyrene Foam Sheeting (more commonly known as Styrofoam):

This is excellent for harsh environment growrooms (your attic for example), provided you have a good ventilation system and a way to keep the temperatures from rising too high (an a/c unit or similar) as it is an excellent insulator.

It is also a great material for use in a temporary setup or for use as a "travelling reflector" on a light mover, where weight is a concern. It is approximately 75-85% light reflective so it is comparable to using a flat white paint. Foam will not create hot spots. Rigid foam can be purchased in sheets, and can be used as a free standing wall or can be taped, glued or nailed to the wall, the last generally being the most successful method.

Emergency Blankets:

These are ultra thin polyester blankets that are sold in most camping stores and are constructed of a single layer of polyester film that is covered with a layer of vapor deposited aluminum.

It is not very effective at reflecting light because it is so thin. Holding it between you and a light source, many small holes are noticed at the intersections of creases and the entire blanket is translucent to begin with, this coupled with the many creases that are in it when you purchase it takes away a significant amount of it reflectivity. It is very easily creased as well which also detracts from its ability to reflect light. And while it is reflects nearly 90% of radiant heat energy, it is only able to reflect around 70% of the light.

The largest advantage of using this type of material is that it is very cheap and therefore easily replaced. Emergency blankets can create hotspots if not attached flush to the wall so it is important that no air gaps exist between it and your supporting wall. The easiest way to attach this is to use tape (Aluminum or metal tape is recommended), as it tears very easily once it is cut or punctured.
 

ALuckyShot

Well-Known Member
That is an awesome post Mrsmcgregor, I really appreciate you sharing that with me. I finally got a thermometer in my grow cabinet today and definitely need to upgrade to the mylar asap. I will start tomorrow most likely, not enough money today to get the aluminum tape and mylar. Thanks again, really!

Sort of trying to get a format going, everyone feel free to add advice and share experiences about what you see in the pictures or notes. I was still torn between leaving the walls as is or doing a upgrade to the mylar, after such an informative post from Mrsmcgregor it sealed the deal, upgrade will be happening by friday at the latest... the bank is holding a cheque up it seems.

So here is todays notes, I keep for my use.

Tuesday July 15th - 12:00am notes

Flood Cycle:
6:30am - 7:00am
8:30am - 9:00am
10:30am - 11:00am
12:30pm - 1:00pm
2:30pm - 3:00pm
4:30pm - 5:00pm
6:30pm - 7:00pm
8:30pm - 9:00pm
10:30pm - 11:00pm
12:30am - 1:00am
3:30am-4:00am

- Watering seems quite often but having done lots of reading regarding it decided to increase schedule during the times when lights are on. Many leaves were drooped rather severely, examination and research led me to believe it was lack of water causing it.

Lights:
On 18 hours, 6 off. 7am - 1am

Nutrients:
These were mixed according to instructions 3 days prior, but I thought I might have noticed nutrient burn on some new leaves, added 3 liters plain water. Newbie mistake of not being accurate enough while measuring and assuming more is better since it is plant food.... More is not better in gardening it seems. Too much of the nutrients definitely causes burn on the leaf tips.

PH:
Unknown, was 5.5 last check. Will measure at next journal entry.

Temperature:
Unknown - no thermometer

General Notes:
-Finish minor construction
-Placed Identification with each plant for future documentation


Tuesday July 15th - 1pm Notes

Flood Cycle:
Same as above
- Added 2 more liters clear water.

Lights:
Same as above

Nutrients:
Need to ensure next batch in a week or so is mixed 100% accurately.

PH:
5.5-5.8, Tested, then asked for second opinion. This is as accurate as I feel I can be with the test kit I have.

Temperature:
92F - yikes this is higher than me right now! I really thought it was cooler in there because of the fans. Whenever I am in the cabinet is doesn't seem bad at all. Probably due to a low relative humidity. I need to purchase a new digital thermometer with built in RHM measuring also. I will definitely be looking into mylar at different stores besides the hardware store. Definitely can't use the aluminum foil if it is contributing to thie temperature.

General Notes:
-Took first labelled pictures
-Noticed that leaf droopage is already not as severe on the clones since increasing the watering cycle. Observed some leafs are not really drooping as much as bending to expose themselves to the vertical running lights. Growth on top of clones looks mostly healthy, minus minor leaf burn which will hopefully be not as bad on new growths since adding more pure water. -Tested PH
-Installed thermometer
-Turned intake fan up another level
-Trimmed off two leaves that were never going to recover.

Purchase list to improve grow:
-Thermometer w/RMH (digital preferred)
-Mylar gift wrap / chip bags ( gift wrap idea better, less mess)
-Longer chains 18" should be perfect for canopy
-2 more 6 inch fans to improve air flow and temp
-Learn about testing PPM and all the mumbo jumbo associated with food (ongoing) and device for testing.

Research to be done:
PPM and nutrients etc...
Temps
nutient burn
Co2 release methods


Any and all advice is welcome.... when critiquing the 2 clones just remember I knew I was going to be battling to get them to thrive after the 2 weeks of torture and 2 transplants during that rough time. Questions and concerns welcome I am a newbie still but learning lots quickly. Journals / pictures will provide empirical evidence good or bad for my setup and allow tweaking :peace::joint:
 

Attachments

ALuckyShot

Well-Known Member
Wednesday July 16th, 2008
1:00pm Notes

Flood Cycle:
6:30am - 7:00am
8:30am - 9:00am
10:30am - 11:00am
12:30pm - 1:00pm
2:30pm - 3:00pm
4:30pm - 5:00pm
6:30pm - 7:00pm
8:30pm - 9:00pm
10:30pm - 11:00pm
12:30am - 1:00am
2:30am - 3:00am
4:30am - 5:00am

-Changing flood cycle to accommodate 24 hour lighting

Lights:
-24 hours from now on, research seems to say plants don't mind and it is one of the benefits of growing indoors.

Nurients:
Research on these seemed to indicate that I should use 1/4 strength and work up, numerous posts on various boards stated the specific brand I have purchased seems to be really concentrated and PPM are really high leading to nute burn when directions per instruction are followed.

PH:
5.5-5.8 still

Temperature:
92F with dresser closed, 84 with doors open. Very consistent temp, would like to lower but limited temporarily, in mean time I have pointed a larger fan towards the back where the intake and exhaust are on the dresser.


General Notes:
- Researched pruning, and cut off older dead / dying branches / leaves. Left well over 50% of the growth in order to not kill plant. Removal of the old leaves was to facilitate easier diagnose of problems in my setup. Harder to diagnose problems when the plants are showing trauma on older growth. New growths look good, still signs of nutrient burn in the odd place.

- Moved seedlings closer to the light canopy

-Received a 3rd clone that spent the time my plants were in the window / single fluorescent in the sun. This clone looks much healthier than my previous 2, only removed 1 distinctly dead/ dying leaf.

-While moving clones accidentally knocked over seedling C. Root system was approximately 3 times longer than visible growth. Looks good only myself to blame if it dies. Replanted within 5 minutes.

-Took pictures / documented.

I am tempted to purchase 5 more lights and increase the total lights to 21 that should essentially make the dresser push 10k Lumens per square foot. It won't do that of course but should be darn close since the math says it would be pushing closer to 12k. All comments, advice, or just to say hi looks like shit or looks good are welcome.
 

Attachments

ALuckyShot

Well-Known Member
* Ph was high when test added 1/4 cap of PH down.

Decided on final setup, fluorescents are too expensive to apply the lux that I want but while be perfect as horizontal lighting. While keeping 14 of the 16 fluorescents I will invest in a 250W HPS / MH combo fixture / ballast. Still need to locate cheap mylar, purchase 2 more 6" fans and a GFI outlet for the whole setup.
 

Gamblor

Active Member
To be honest man you need to just rip down that aluminum foil...it's doing more harm than good at this point and I bet you could drop the temp. in that box substantially if you did. You shouldn't even use that stuff as a last resort, and that extra heat is just stressing the fuck out of those plants. If you can get that temp down and invest in that new light combo you're talking about, you could be in for some decent buds :P
 

ALuckyShot

Well-Known Member
Today was a busy day, the only thing I accomplished in regards to my grow was removal of the tinfoil, and painting the inside with mat white paint. I need some more paint and will get it looking sweet shortly. Just a heads up for any other newbies out their like myself. Take Mrsmcgregor, and Gamblor's advice don't use tin foil even as a last resort. I hadn't created so much of a grow cabinet as I did an easy bake oven. Hopefully the temps will come down at least a few degrees since last night I tried closing the cabinet for the night and when I woke up it was just under 100F....... ya I suck everything still looks alive.
 

Attachments

ALuckyShot

Well-Known Member
Thursday July 17th, 2008

Lights:
Same 24 hour

Nutrients:
Added more water still believe plants are experiencing nute burn

PH:
5.5

Temperature:
84F but has fallen since taking down aluminum foil and painting white.

General Notes:
-Better lighting, more cooling, purchase distilled water & change reservoir water asap.
 

Gamblor

Active Member
Keeping my fingers crossed that you can get that temp steady in the 70's, but I'm pretty confident you can.

Just keep giving the updates how you have been, makes it nice and easy for us to analyze :D

ROCK on
 

ALuckyShot

Well-Known Member
Thanks for the help Gamblor if you or Mrsmcgregor have any more advice just fire away (+ rep to both of you), and welcome to my first grow Dr. Brownthumb. You said I should push for the mid seventies so I am sure you will like todays update!


Friday July 18th, 2008

Lights & flood cycle:
Same as above

PH:
5.5

Temperature:
76F

General Notes:

-Painted the cabinet with a second / third coat as required.
-Installed locking door handle on grow room door
-Installed a Small Air conditioner in the grow room which has greatly lowered the temperature.
-Puchased materials for running a duct straight to the cabinet from the A/C in the future if required.


I know lame pics today, just having fun documenting everything :hump:
 

Attachments

MrsMcGreggor

Well-Known Member
your pics are not lame at all. YOU silly silly goose........
every one of those pics shows thought and careful planning
on how you used your HARD earned $$$. to make a new home
for your babies.
I find it wonderful the time an care you take to make the photos.
as well it reflects that in the future you will
show the same care for your little ones.... this makes coming to
your little room a delightful place to come visit.
Keep up the good work.
 

ALuckyShot

Well-Known Member
Thank you very much for the words of encouragement Mrsmcgregor:D

Where to start.... I finally read about hydroponics and nutrient delivery and found out why you need to know your PPM in one of these systems. My plants really aren't booming at all and if anything are getting worse by the day. I figured there must be numerous issues with my rig and in a desperate attempt to not lose my clones I figured I better get cracking.

-Drained reservoir
-Added spring water at 300PPM
-Added only 25% of nutrients
-Ph test and adjusted
-changed water schedule again

New water schedule is shorter per flood since I am probably drowning my plants with the half hour floods, reduced to 10 minutes 8 times a day.

In sad news I have also noticed what I believe are spider mites. My little research so far basically tells me these things are a prick so any advice is welcome! Or watering advice 8 times a day for 10 minutes too much too little? I keep hearing similar flood durations around 6 times a day but that maybe 18 hour lighting.
 

Gamblor

Active Member
Damn dude; I wish I could be more help with the watering schedules, but I REALLY don't know shit about hydroponic grow systems :(

As for the spider mites; what signs have you seen that suggest spider mites? Do you see them (they're too small to see with the naked eye really, unless they're in clusters)?
You should find Avid if you are sure that spider mites are your problem, but that shit is expensive...Again what do you see?
I'm gonna pass out drunk praying that you don't have a mite infestation...seeing as this shit will kill your plants (most likely) if not addressed rather quickly.
Damn...
Again...
What do you see man....

P.S. Good job on getting the temp down :P
 

ALuckyShot

Well-Known Member
Hello Gamblor,

In regards to the spider mites I have been noticing leaf damage and did the test where you place a piece of paper below a leaf and shake it, then check the paper. The thing on the paper may not have been a spider mite but there certainly was something on the paper that was alive, little, and moving.

I trimmed a couple of the leafs, and added some open water in hopes of raising the humidity slightly since I read that it can hamper their propagation. I will try and get some nice pictures of the leafs today, maybe it is another pest. I blame the general failure so far of the system more on nutrient issues etc but definitely noticed some sort of pest :(

* edit

I went and looked closer at my plants, removed some of the nastier looking leaves there was distinctly the odd little spider web, I found another insect / pest of some sort that looked different than yesterdays. This one was more white /yellow in colour yet still reminded me of a spider, last night the moving insect was black. The nastier leaves included some that had cob webs underneath, or lots of black specks on the underside of the leaves. While examining the plants I removed them from their tray. Clone 1 & 3 still have no visible roots outside of the mesh pot. Clone 2 has some nice new root growth, however both clone 1 and clone 2 show signs of health issues. I do believe Clone 1 and 2 will get better with the new water & watering schedule I will leave them alone for awhile. I figure pruning is not an effective long term solution to pest control but I read it really isn't a horrible way to help when used in conjunction with other means which I will get soon :D Thanks again Gamblor.
 
Last edited:
Top