You are using an out of date browser. It may not display this or other websites correctly.
You should upgrade or use an alternative browser.
You should upgrade or use an alternative browser.
150w HPS Club: Inspirational Resource
- Thread starter MisterMicro
- Start date


cannabiscult
Well-Known Member
they are about to explode upward man get ready.......awesome plants
winkdogg420
Well-Known Member
is that fan from an airhockey table??dam it didn't work i'll try this. this is my setup

evilbong419
Active Member
thanks man the one top looks funny because i bend it four times a day to promote some under growth. some will say that bending them can stress them and stunt the growth. It you look at mine you can see it does more good than harm. Your plants love to be tuched and bent and moved around you will get stronger stem and hardy BUDS.
evilbong419
Active Member
it looks like it is to me. hehehe
Zhu
Well-Known Member
airhockey table fans are sweet just loud as hellis that fan from an airhockey table??
KamanderKalit
Active Member
Is anybody in here good with wiring 150w hps ballasts?
onthedl0008
Well-Known Member
Yea it would be cool for a diy link for remoting these econolight 150's?
SmokeyMcSmokester
Well-Known Member
bxke has a thread on it
evilbong419
Active Member


bc.trip
Well-Known Member
Yea it would be cool for a diy link for remoting these econolight 150's?
here's a link for a page right in this thread. it's really easy.
SmokeyMcSmokester
Well-Known Member
welcome to the club...hopefully get you outta that brick weedAnother inspired 150 user here!
8 Bagseeds, 15 days young and kickin' assI wll post up some better pics when my girlfriend brings back the cam. I don't know why they even put them on some phones

onthedl0008
Well-Known Member
I dunno but im not seeing a diy remoting of an econolight anywhere lol.. is this diy hidden inside of a link of one of these threads lol...wow im really smoked out but im going to search bykes diy either way.
SmokeyMcSmokester
Well-Known Member
lemme find it.
bc.trip
Well-Known Member
haha i forgot to include the link in that last post. here you go.
https://www.rollitup.org/indoor-gro...ub-inspirational-resource-21.html#post1584184
https://www.rollitup.org/indoor-gro...ub-inspirational-resource-21.html#post1584184
SmokeyMcSmokester
Well-Known Member
https://www.rollitup.org/cfl-growing/120470-my-20-150w-hps-econolight.html
Im pretty sure this is the thread
Im pretty sure this is the thread
BRICKWeeD
Active Member
Thanks! My friend and I started before christmas....He is using natural sunlight(everyday)and a growbulb....Saw his today Looks like mine did on day 4....haven't shown him mine yetwelcome to the club...hopefully get you outta that brick weed
 I may buy another 150. Mine was 85 bux at lowes..I saw where they are 20 online but, I am very impatient! Just need to sling a little more BRICKWeeD!
frostythesnowthug
Well-Known Member
I will be using a 150 HPS in my flowering stage. JUst reached D37 from seed and almost ready to move the young ladies, I hope, to the 150 lamp. I am using CWF for the Veg stage.
The system is a DWC/Drip hybrid and I have some "White Widow" and some "bonus seed" from a seed bank in Europe.
I have a grow thread www.rollitup.org/grow-journals/141450-under-stairs-project-1st-build.html
Would love to get in on the seed contest. I like my new hobby so far and I look forward to seeing how well I can do.
Check out the grow thread and let me know if you have any suggestions or comments.
Pics are Day 17, Day 22 and Day 37 from seed
Peace
Kaze just stick around and as soon as i have the beans ready they'll be up for grabs..
Yea it would be cool for a diy link for remoting these econolight 150's?
haha i forgot to include the link in that last post. here you go.
https://www.rollitup.org/indoor-gro...ub-inspirational-resource-21.html#post1584184
Yup theres a remote ballast procedure in this thread in the early pages for remoting the econo and wiring, and another tutorial a lil later for remoting other ballasts
Another inspired 150 user here!
8 Bagseeds, 15 days young and kickin' ass
Lol yeah some phone cams suck, but they're lookin god all the same
As smokey said, Welcome, and glad to have you all onboard
Much love
Frosty
frostythesnowthug
Well-Known Member
For all your wiring, I recommend getting heavy duty replacement cables. I purchased an 8 ft., 16 gauge replacement cord rated for 13 amps. Operating safely is important when you are doing something like this. To impart some electrical knowledge
Electrical wire comes in many thicknesses (gauges) indicated by number. Higher numbers indicate smaller wire and lower numbers indicate larger wire. Most household circuits are connected with 14-gauge wire. Wire thickness is important for two reasons--ampacity and voltage drop. Ampacity is the amount of amperes a wire is able to carry safely. Electricity flowing through wire creates heat. The more amps flowing, the more heat created. Heat is wasted power. Avoid wasting power by using the proper thickness of well-insulted wire.
Ensure that you have a fuse in your house that you can plug this into safely. You can see the amperage rating of your fuse by looking at the number on the fuse in your fuse box. Most will be 15. If you have an American circuit breaker then your are probably running 120V. Safe usage of the electricity running through there is %80. You want to maintain this to reduce heat buildup and/or overload. 120 * 15 = 1800W. 80% of that is 1440W. Now consider other things you may have running on that circuit:
-Computer with 350W power supply?
-Lamps with 40W light bulbs?
-Printers?
-Heaters?
-Appliances?
-You get the point. Check your s$%& and don't overload your circuit.
Getting back to the cord... considering an 80% safe usage on the 13 amps, you can still safely use the wire for the 150W lamp. I will not go into the math here, again. If you are interested in the details: look up Ohm's Law.
With the electricity discussion behind us, we can now get onto the fun stuff.
So, the first step is getting your lamp. You can order it from the company using their online order form. I ordered an extra lamp with it. Here is what I got in the mail:

While that is on it's way, you should need some supplies. Before you go out and get some used supplies from some junk bin at a hardware place or out of a dumpster: consider where these electrics may be and/or what they may be near. Now consider the god-awful molded, rotted, worn down meth house this little electrical screw may have come from. Just think about that when you are getting supplies. They aren't very expensive and you'll have to clean the other stuff anyway. So, here's what you'll need:
-the previously discussed wire - I recommended 8ft. because that is plenty for my needs. In this guide, we will be cutting the wire in different lengths: 1 being the plug to the ballast, the other being the ballast where the lamp/socket needs to be. Ensure you get a long enough replacement cable, or additional cable, to suit your needs.
-a 4 inch electrical box
-some wire cutters and wire strippers (or a combo of the them)
-wire screws (variety pack with different sizes is good)
There are other alternatives to the above, but you get the idea.
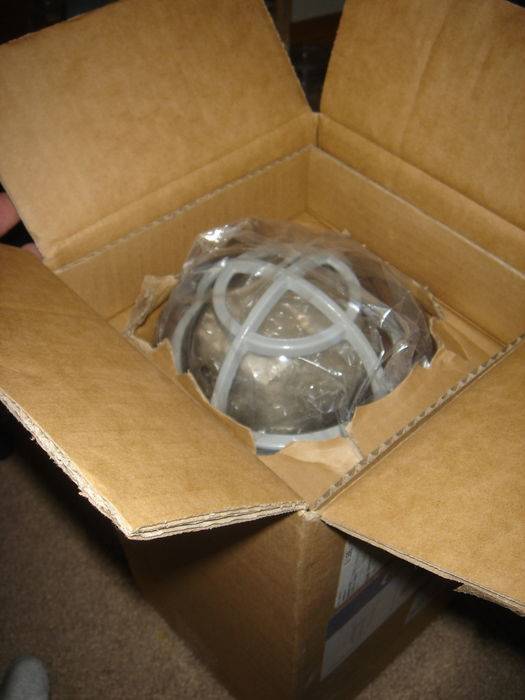
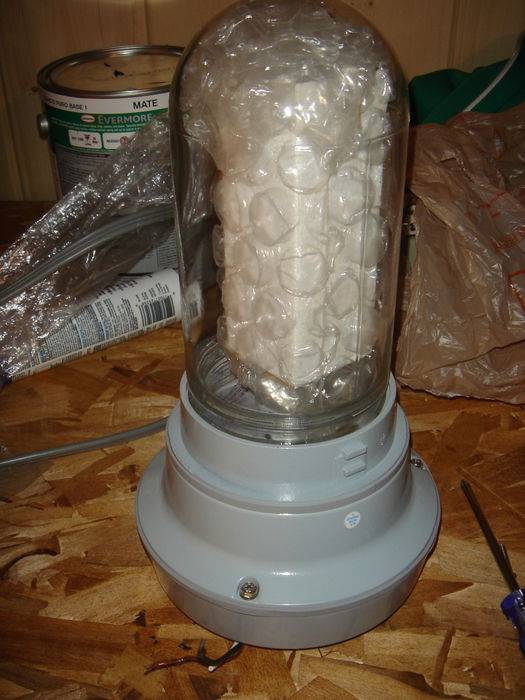
Once a week or so has passed, you'll have your supplies and a lamp. Now that you have your light, you can become a little bit happier:

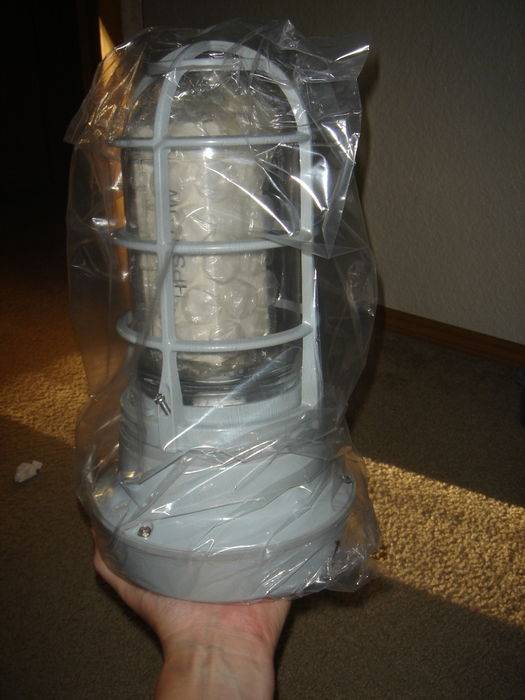
With your excitement complete, it's time to get your light out of the package and get it ready to disassemble:
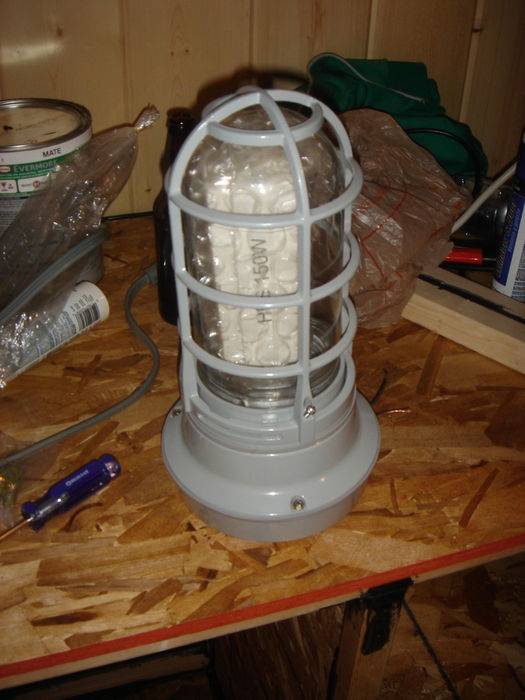
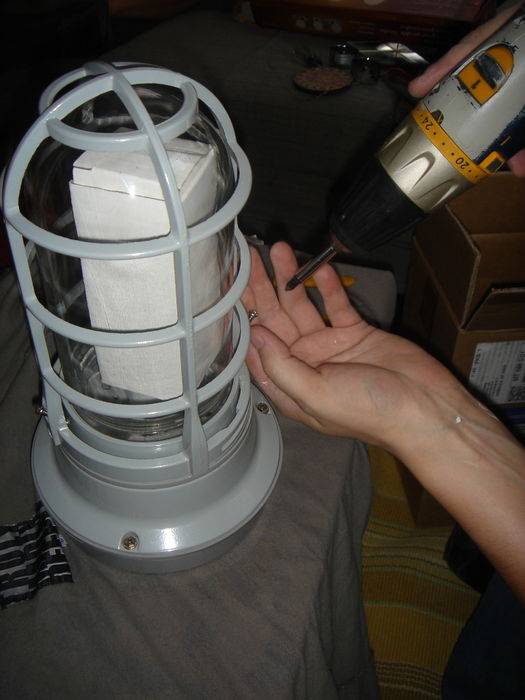
The first thing you'll notice about the light is that it is much heavier and bulkier than anticipated. Trust me. The first two things to remove are the screws on the outside that hold the cage and "light jar" for lack of a better word:

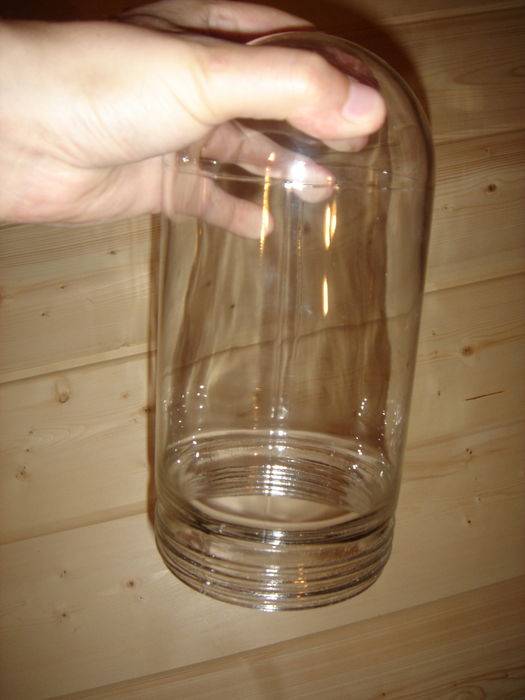
Screws removed, you can twist the cage and pull it off. The light jar will twist out, like a jar, and then you can get your lamp from inside. Set your lamp aside:

Try not to get too many fingerprints on the lamp. If you do, most suggest you wipe them off with a cloth:

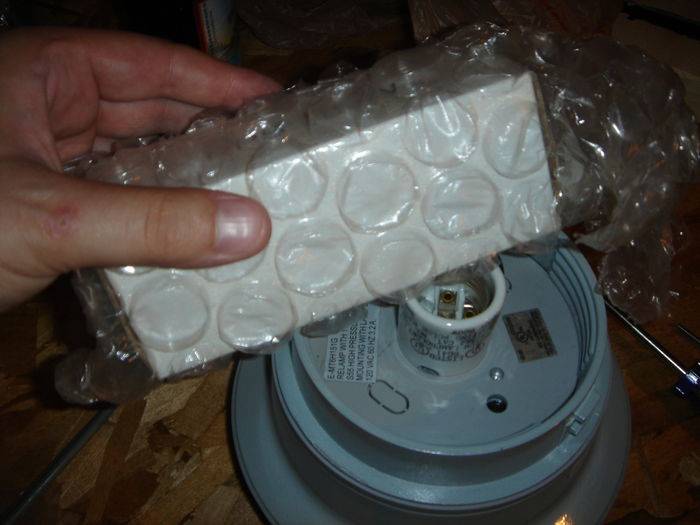
There are some weird hidden screws that you have to get to now. They are hidden underneath the large flat rubber guard in the ballast housing. Simply pry the rubber casing up and cut it off. You don't need it. Then you can access the screws underneath:


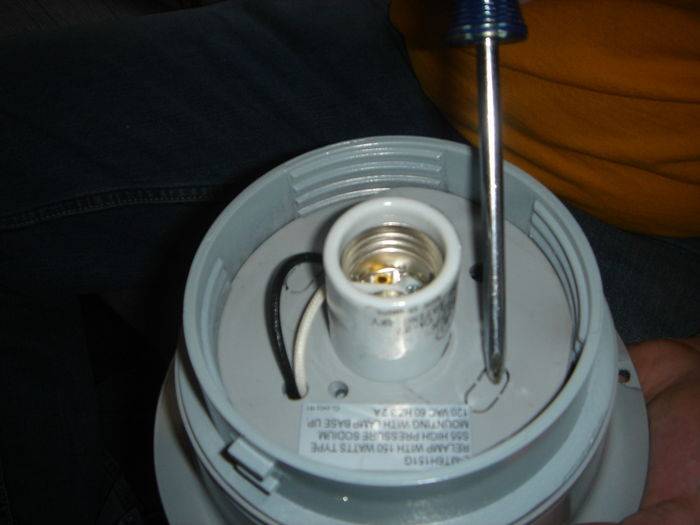
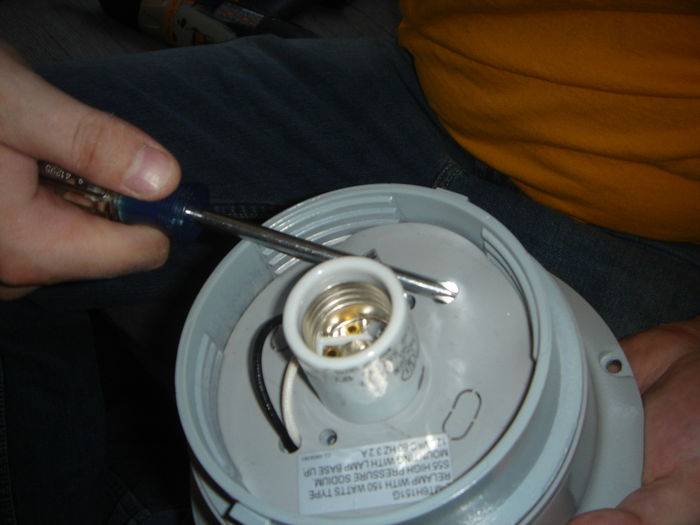
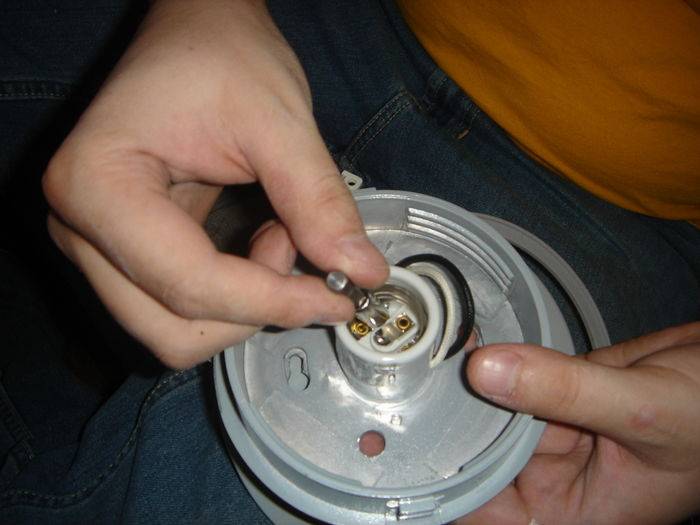
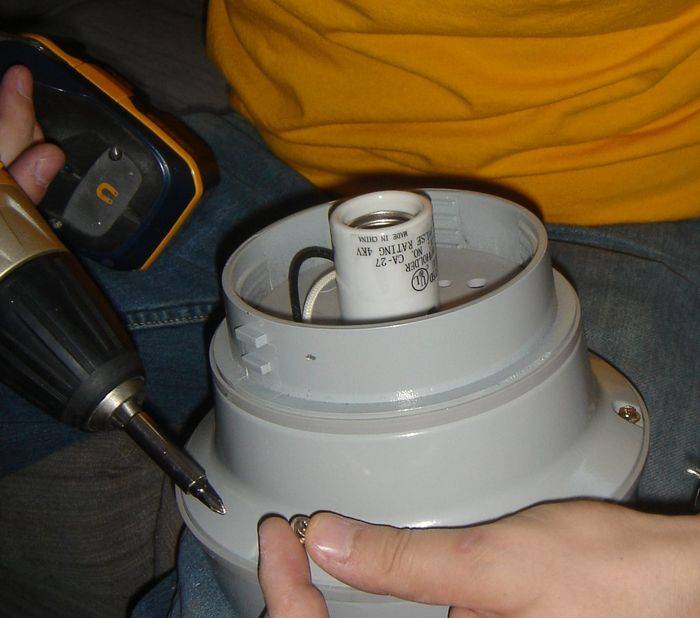
Once you have removed those screws, you will want to remove the screws that are in the very base of the light socket. They are two small silver screws. Be careful when you are removing these and use a small enough screwdriver to fit in there. You don't want to jam something in there and break the socket. I took the bit out of the screwdriver and used it:
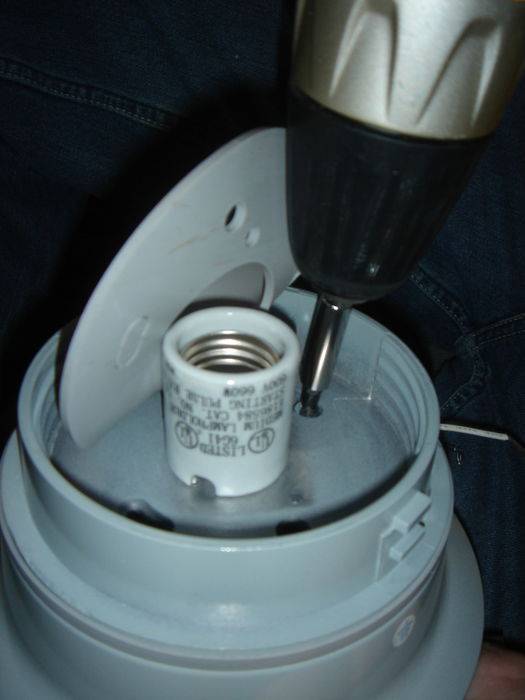
Now you can move to the 3 screws surrounding the ballast housing:
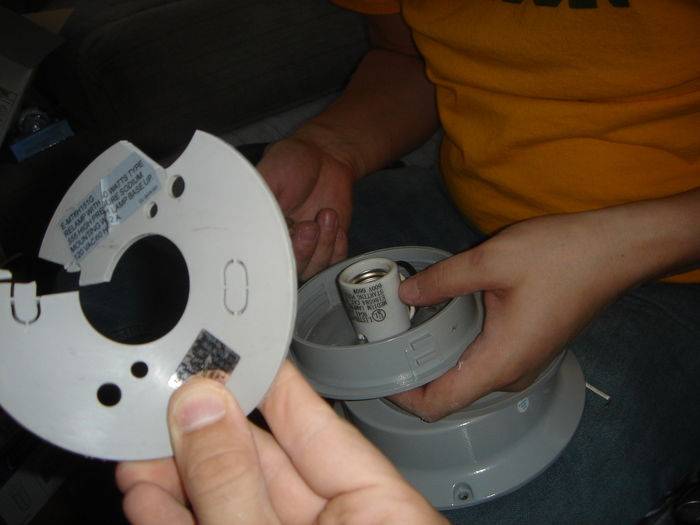
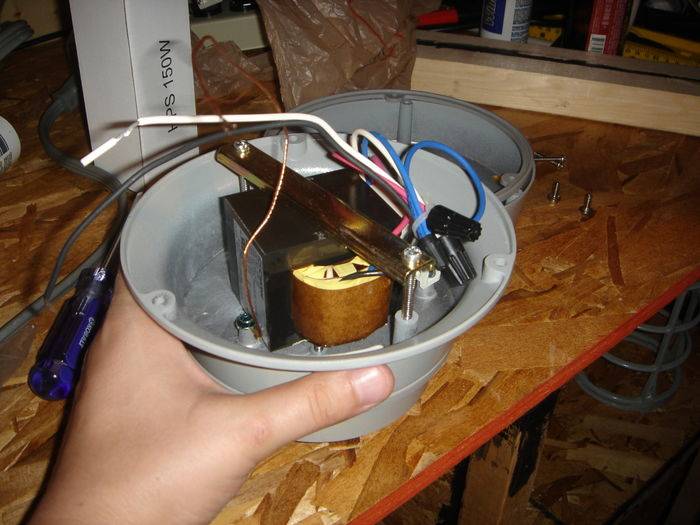
The light will open, and you will see the 4 parts that are the inside of the light.
There is a brass colored bar that is holding the ballast in the casing. Leave that in there for now. You can inspect the parts now in all of their glory. Before you disassemble, take a good look at how the unit is wired. Especially if you are unfamiliar with wiring. While a guide can be helpful, but it is good to take a look for yourself. Take notes if you want. Now you can take off the big brass bar. Unscrew all the wire caps. If you took the screws out of the socket before, it will come off now. Now you have your ballast, your ignitor, and your socket. You should give yourself a pat on the back 'cause your halfway through.

here;s the post again
Similar threads
- Replies
- 39
- Views
- 6K