OutdoIndo
Active Member
First of all, I just want to say that my main goal is to create the cheapest most inconspicuous set-up i can, in order to grow indoors, with very limited space and w/o raising the electric bill noticeably.
Supplies:
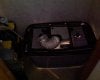
- Largest Rubber/plastic storage bin (with lid, and preferably black) from Big Lots or Wal-Mart $8.
-2 hanging light socket, (reflectors removed) from Wal-Mart $4.
-2 two-way socket splitters from Wal-Mart $4
-1 4pk Great Value soft white CFLs 26W, 1700 Lumens ea. from Wal-Mart $7
- Febreeze air purifier w/charcoal filter (tobacco) from Wal-Mart $15
-1 roll foil-like present wrapping paper from Wal-Mart $5
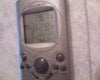
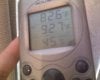
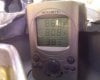
-1 Temp/humidity gauge from Wal-Mart $10
-1 Bathroom Exhaust fan from Lowe's $10
-1 !2"x12" L.E.D. grow panel from ebay $30 (optional)
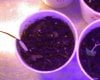
-1 bag Miracle Grow Potting Soil (8-8-") , Wal-Mart $4
, Wal-Mart $4
-Tape and a box cutter $4
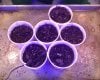
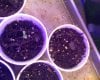
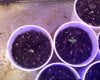
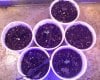
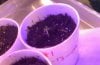
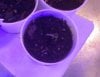
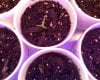
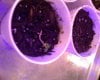
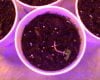
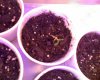
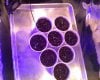
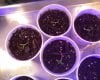
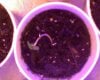
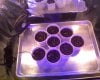
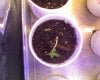
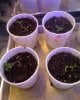
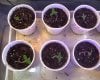
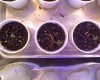
-Styrofoam cups for vegging. $1
-Coke Bottle Bottoms for flowering $4
-2 Timers (One for the lights and one for the fan) $10 at Big Lots or Wal-Mart
Total: around $130
Note: When growing in this container, is is important to know that you will be bending and training the stems and keeping the roots compact in order to keep the plants shorter. Also this is only enough light and space for 2-4 plants. If you are not comfortable bending, you can get another plastic storage bin and use the bottom of it as the lid for your set-up. That will give you an extra 2 ft of upward growspace!
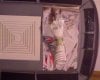
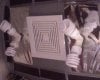
Step 1: Measure 2x cut once
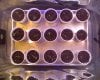
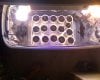
Measure and cut a square hole in the center of the lid for the exhaust fan. Also measure and cut circular holes (evenly) just big enough for the tips of the sockets for fit into, on either side of the fan box hole. Now, in the bottom container, cut 2'x4" rectangular (intake) holes at the bottom of the shorter sides.
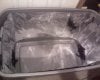
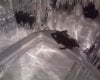
Step @: Taping the "mylar"
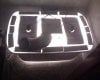
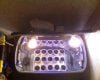
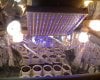
By far, the hardest part of this is applying the mylar. i highly recommend duct-tape or a really sticky, strong packing tape for this. Remember to make about 10 pieces redi before you start. Measure the mylar to cover as much as you can of the inside of the base. It is formed with some difficult angles, so you have to be careful not to crease the paper as you apply it. Try to make it more like a bowl than a square. Don't forget the lid!!! Cover as much space with this as possible, except the floor or bottom of the box.
Step 3: Wiring
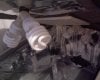
Easy stuff... assemble everything then start splicing. Run your 2 light sockets together so they can be on their own timer. Extend the fan plug 6' or so, so it can have it's own timer too. And have it all grounded and on a good powerstrip.
You are done! (actually just redi 2 start) Plant some seeds or clones and set ur timers, water them and watch them grow!
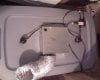
p.s. i'll post pix of my set-up soon, just made it yesterday so i need to take some pix first...
Supplies:
- Largest Rubber/plastic storage bin (with lid, and preferably black) from Big Lots or Wal-Mart $8.
-2 hanging light socket, (reflectors removed) from Wal-Mart $4.
-2 two-way socket splitters from Wal-Mart $4
-1 4pk Great Value soft white CFLs 26W, 1700 Lumens ea. from Wal-Mart $7
- Febreeze air purifier w/charcoal filter (tobacco) from Wal-Mart $15
-1 roll foil-like present wrapping paper from Wal-Mart $5
-1 Temp/humidity gauge from Wal-Mart $10
-1 Bathroom Exhaust fan from Lowe's $10
-1 !2"x12" L.E.D. grow panel from ebay $30 (optional)
-1 bag Miracle Grow Potting Soil (8-8-
-Tape and a box cutter $4
-Styrofoam cups for vegging. $1
-Coke Bottle Bottoms for flowering $4
-2 Timers (One for the lights and one for the fan) $10 at Big Lots or Wal-Mart
Total: around $130
Note: When growing in this container, is is important to know that you will be bending and training the stems and keeping the roots compact in order to keep the plants shorter. Also this is only enough light and space for 2-4 plants. If you are not comfortable bending, you can get another plastic storage bin and use the bottom of it as the lid for your set-up. That will give you an extra 2 ft of upward growspace!
Step 1: Measure 2x cut once
Measure and cut a square hole in the center of the lid for the exhaust fan. Also measure and cut circular holes (evenly) just big enough for the tips of the sockets for fit into, on either side of the fan box hole. Now, in the bottom container, cut 2'x4" rectangular (intake) holes at the bottom of the shorter sides.
Step @: Taping the "mylar"
By far, the hardest part of this is applying the mylar. i highly recommend duct-tape or a really sticky, strong packing tape for this. Remember to make about 10 pieces redi before you start. Measure the mylar to cover as much as you can of the inside of the base. It is formed with some difficult angles, so you have to be careful not to crease the paper as you apply it. Try to make it more like a bowl than a square. Don't forget the lid!!! Cover as much space with this as possible, except the floor or bottom of the box.
Step 3: Wiring
Easy stuff... assemble everything then start splicing. Run your 2 light sockets together so they can be on their own timer. Extend the fan plug 6' or so, so it can have it's own timer too. And have it all grounded and on a good powerstrip.
You are done! (actually just redi 2 start) Plant some seeds or clones and set ur timers, water them and watch them grow!
p.s. i'll post pix of my set-up soon, just made it yesterday so i need to take some pix first...