DiY LEDs - How to Power Them

FranJan

Well-Known Member
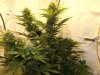
Also have you guyz seen any of these yet? Anyone using the? I know they're not MeanWells :o but still. Programmable drivers. No timer needed. Be AWESOME in my book if they could adjust the mA of your CoBs when temps get too high in your tent.

http://www.trcelectronics.com/led-power-supply-programmable.shtml
http://www.trcelectronics.com/roal/power-supply-rsoz070.shtml
http://www.trcelectronics.com/View/Roal/RSOZ070-200-FULL.shtml
https://www.trcelectronics.com/ecomm/pdf/RSOZ070.PDF
https://www.trcelectronics.com/ecomm/pdf/MANUAL-OZONE.PDF
 

SupraSPL

Well-Known Member
Thanks for the pointers, guys. Supra, I haven't kept up with your design philosophy but last year we both preferred efficiency over pushing the lights hard. If you were going to fire two CXA3070's, which Meanwell driver would you pick?

I know, what a lazy ass. Thing is, I don't want to study some chart and go, "OK, I think I want this one".

I'm already a little confused about the recommendations that were made. Dloomis mentioned the 700 or 1400 models. What about the HLG-120H-C1050? Wouldn't that be a good compromise if I was looking for something with a little more punch than 700 mA?
If you are sure you are not going to expand beyong 2 CXA, the HLG-120H-C1400A/B would be ideal because your Vf would be closer to the max, and you could dim it a bit without affecting driver efficiency too much. A cheaper option, a pair of these
 

SupraSPL

Well-Known Member
@ Supra - I've been lurking these forums for a while. NO doubt you're a font of knowledge, but I'm not sure I agree with your statement about PFC (I probably don't understand it correctly....)

"Non-PFC in a nutshell draws more current but not more Watts"

We pay for Apparent Power (VA), but we only see useful work done from Real Power (W)

Lets say that for example that this image represents a device with PF of 0.8.
if we reduced the PF to 0.4 then Q would double (ish) and so VA increases, if VA increases we pay more.

Please correct me if I'm wrong, I am doubting myself know...
Kind Regards, UKP
Hey somehow I missed this post. We do not pay for apparent power we pay for real power. Somewhat confusing names right. Some industrial factories are billed by apparent power but residential hookups are billed by Watts (for now).
 

OldGrower

Well-Known Member
SupraSPL, just a quick question about sanding. Got my vero 10's and heatsinkusa 2.08 and will be using your method for attachment ie kapton tape. So I know to sand the heatsink with 1000 grit do you also sand the back of the vero 10? Also how big of a dab of pk3 goes on the vero 10 before attachment to the heatsink? Thanks a million will upload a pic when done, OG
 

medicinehuman

Well-Known Member
DSCF0179.JPG I'm know this is old news but I am trying an upside down cone from the soil up. I had an old dog cone that they wear when they get a vasectomy. I put it under a 2 week old White Widow to see if it help's underneath any at all. I was going to give it to charity but I'll wait and see. There is a more mature Widow in one picture @ 6 weeks.
 

Attachments

Dloomis514

Well-Known Member
View attachment 3348449 I'm know this is old news but I am trying an upside down cone from the soil up. I had an old dog cone that they wear when they get a vasectomy. I put it under a 2 week old White Widow to see if it help's underneath any at all. I was going to give it to charity but I'll wait and see. There is a more mature Widow in one picture @ 6 weeks.
I notice the plant hasn't been licking itself, so you have that going for ya!
 

augusto1

Well-Known Member
View attachment 3348449 I'm know this is old news but I am trying an upside down cone from the soil up. I had an old dog cone that they wear when they get a vasectomy. I put it under a 2 week old White Widow to see if it help's underneath any at all. I was going to give it to charity but I'll wait and see. There is a more mature Widow in one picture @ 6 weeks.
Why did you posted this over here ? it has nothing to do with what this thread is about.
 

UKpeanuts

Well-Known Member
SupraSPL, just a quick question about sanding. Got my vero 10's and heatsinkusa 2.08 and will be using your method for attachment ie kapton tape. So I know to sand the heatsink with 1000 grit do you also sand the back of the vero 10? Also how big of a dab of pk3 goes on the vero 10 before attachment to the heatsink? Thanks a million will upload a pic when done, OG
a) I probably wouldn't sand the back of the COB. on the datasheet there's probably a tolerance for the flatness, i think its unlikely you will improve on this.
b) the thermal paste should be as thin as possible to increase the rate of heat transfer, (making both mating surfaces (COB&heatsink) as flat as possible reduces the amount of themal paste reqd.)

people who know more than me will be along shortly haha,
 

SupraSPL

Well-Known Member
Its all good this thread goes every which direction at this point but most of us are here for the same reason so this data should be summarized. For those who have not seen the DIY COB Reflector thread, in summary, reflectors are critical if your COB is 10" or more from the canopy, boosting intensity by as much as 40% in the center and 25% at the edges. I tested a dozen reflective paints and it turned out the best one was the one I already had, Rustoleum White High Heat paint 7751 and cone shape is very good for COB reflectors. I had high hopes for the Rustoleum 2X Satin Blossom color 249843, which has 20% TiO2. It is extremely white and reflective but did not come out satiny, it was too diffuse maybe because it was too cold.
 
Last edited:

SupraSPL

Well-Known Member
@OldGrower Sorry if I lead you and others in the in the wrong direction, but from testing temp droops (check out the Heatsinks for DIY LED thread if you are interested in details) I quickly discovered that there is no benefit to sanding the heatsink surface even though they are not flat. I take full responsibility for wasting DIYers time including my own, but I came by the 1000 grit recommendation from the CXA Design Guide PDF. In practice, the thermal compound takes care of the gaps sufficiently. I tested CXas and Veros at high levels of dissipation (100W) to see if the sanded heatsink had any benefit and to my amazement, there was no difference in output.

In addition, there was no difference in performance between the Prolimatech PK3 and stock paste on the Alpine 11 (Arctic MX4 paste) and the Rosewill RCX-Z1. I still use and recommend the PK3 (nano aluminum based) but the MX4 works great (carbon based) and they are about the same price.

UKP is correct, there is no need to sand the back of the Veros, even if there were a benefit they are quite flat. I still sand my heatsinks and stars flat, partially out of habit but also to reduce the chance of air bubbbles or air creeping behind the COB over the years. But I admit it is not necessary as long as you use a generous amount of thermal paste. I make sure that every part of the COB back is covered, press on the corners and makes sure it is squeezing out on all sides. Then I clean up the excess with alcohol and tape 2 corners so it cannot move any directon. Then solder the connections carefully, the thermal pad on CXAs can lift when hot if there is any tension on the wires when soldering. I have even seen one lift just from tinning the pads.

Overall this temp droop data is loads of great news for COB DIYers
  • our junction temps are lower than we thought and we are experiencing very little temp droop (.3-.8% @.8A, 2% @1.4A, 3-4% @2.4A)
  • Vero series handles heat extremely well and CXA series very well
  • Arctic/Rosewill stock paste works great
  • no sanding required, one less labor intensive step to worry about
  • no drilling/tapping required, thermal paste/kapton method does an excellent job cooling the COB, even at high dissipation
  • make sure to clean oils off the heatsink before using kapton method, especially copper
  • reduced the amount of heatsink surface area necessary for modern COB builds to 25cm²/W for active cooled and 75cm² for passive cooled
  • running CPU cooler fans higher than 5V resulted in a decrease in efficiency in almost every case
  • chunky heatsinks like Alpine 11/Rosewill RCX-Z1 perform just as good as elaborate heat pipe style coolers (200W OCZ Vanquisher)
  • best performing heatsink was copper slug/blow through style, but only fits CXA3070 and only matters at high dissipation
  • we can run CXA3590/Vero29 on Alpine 11 at 100W with acceptable temp droop 2-4%.
 
Last edited:

Imptspd

Well-Known Member
Hey!
Has anyone ever had any deal with "TE Connectivity 2-2154857-2" - CXA30xx holders...
http://www.digikey.com/product-search/en?KeyWords=A107375&WT.z_header=search_go

I got these, ten pieces, dunno how to use them... they have some small dickie downside, so i have no idea how it holds cob, ok, there are screws, but that dickie is messing smth up dunno...
How the wire holds inside? :D
.
i believe those are to drop in a small hole so when you screw them down they don't move. I just built a light with them last night and cut them off with a razor blade. If you do what I did, just be careful when screwing them down so the holder doesn't twist while mounting your cobs. And as for how the wire connects, just push the wire into the hole, the holder will lock the wire in place. To make it easier to insert wire I used solid core wire. If you decide to use stranded wire I would twist the wire and lightly tin it afterwords.
 

uzerneims

Well-Known Member
.
i believe those are to drop in a small hole so when you screw them down they don't move. I just built a light with them last night and cut them off with a razor blade. If you do what I did, just be careful when screwing them down so the holder doesn't twist while mounting your cobs. And as for how the wire connects, just push the wire into the hole, the holder will lock the wire in place. To make it easier to insert wire I used solid core wire. If you decide to use stranded wire I would twist the wire and lightly tin it afterwords.
Thanks man, this will help me a lot :)
Was it easy to mount them on heatsink?
So must-do is to drill hole all-through heatsink?
 

Imptspd

Well-Known Member
Thanks man, this will help me a lot :)
Was it easy to mount them on heatsink?
So must-do is to drill hole all-through heatsink?
1) I marked out on the heat sink with a pencil where the fins were,
2) then I placed the cobs where I wanted them to be on the heatsink,
3) I placed the holders where they would be on the cob/heatsink making sure the screw hole was between the fins,
4) I marked with a pencil where the screw holes were on the heatsink through the led holder screw hole (might be wise to use a center punch)
5) pulled off the cob and holders
6) drilled where I marked the screw holes on the heatsink
7) tapped those holes for the screw
8.) cleaned the heatsink with rubbing alcohol
9) applied a dab of thermal grease to the heatsink where the middle of the cob would be
10) placed the cob on top of the thermal grease and gently pressed down on the edges of the cob and gave a couple of left/right/up/down movements to help disperse the grease evenly between the cob and heatsink
11) placed one holder in position and screwed it down
12) did the same with the other holder
Hope this helps, I used to work in manufacturing so it might not seem as easy to others as it was for me.
Edit. Yes I drilled all the way through the heatsink because I had a tapered tap.
 
Last edited:

SupraSPL

Well-Known Member
Yes 4 Vero18s are OK, 5 is too many. If you go with HLG-185H-C1050B you could get 6 Vero18s and get a bump in efficiency, cost/PAR W almost the same because of fitting more on one driver.
 
Last edited:

zep_lover

Well-Known Member
supra i am going to build a new veg lamp with vero10 .Bridgelux BXRC-40E1000-B-03
i plan on using 4 or 5 on the 2.079 profile 44 inches long.
what driver do you recommend?
i am thinking this one (10-18)*1W LED External Driver Power Supply 85~265V
what are the best connectors to use?
 
Top