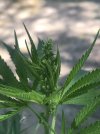
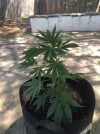
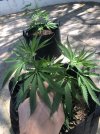
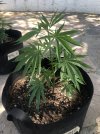
Sealed Tent, Living Soil & The Quest For Fire

cdgmoney250

Well-Known Member
Hey Everyone, I’ve been meaning to make a grow journal for some time, but life happens, and so it’s only now that I’m starting a grow log.

I’ve always wanted a solid organic indoor soil grow where I could control all the environmental parameters to my choosing and watering was taken care of automatically. Well, I think I’m just about there.

I put this setup (minus watering) together over 2 years ago for one run and then shut it down until very recently. Still some minor tweaks and things I’d like to do, but all in all, this setup has been great.

Last and only run until now…
IMG_9203.jpeg
IMG_9317.jpeg
IMG_9667.jpeg

Environmental Control:

HomeBox 4’ x 8’ Grow Tent
2x Fluence Spydr 2i 650W LED Lights
Fluence Digital Dimmer
Simple Digital Timer
70 Pint Dehumidifier (from Ace Hardware)
4x Hurricane 6” Clip Fan
2x-4x Alibaba 7” Oscillating Clip Fans
CO2 Tank w/ Regulator
Penguin 2-1/2 HP Water Chiller
2x Hydro Innovations Ice Box Chillers
2x AC 6” In-line Fans & Mufflers
Spartan Complete Environmental Controller w/ Fuzzy Logic CO2

Cooling System:

The tent is cooled by water-cooled air handlers.
I have a Penguin Water Chiller that chills a 25 gal cooler “reservoir”, from which I plumbed the chilled water to the air handlers on each end of the tent. Everything is operated by 2 water pumps both located in the reservoir. One for the chiller, and one for the air handlers. The Ice Boxes each have their own 6” adjustable flow inline fans so air flow and temp is very easily controlled.

Irrigation System:

13 Gal Reservoir
Sureflo High Pressure 3 gpm Pump
DIY PVC Irrigation Manifold With Mister Heads
Simple Digital Timer
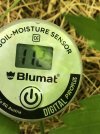
7x Blumat Soil Moisture Meters

The irrigation gets plumbed from the bottom of the reservoir through the manifold and dumps back into the reservoir. I have a valve on it so I can control the pressure of the pump which affects the spray pattern of the mister heads. The mister heads are in an 8” grid across the garden bed. I use the Blumat Soil Sensors to dial in how much and how frequently to water, which I can then set on the digital timer. I water for 1 minute on, 2 off, which allows the water to soak in without pooling on top.

Soil:

I’ll likely expand on the whole process I went through with building this soil in another post, but it’s sort of a modified version of Coots Mix with my own little tweaks.
More to come.
 
Before I get into my soil mix, I just wanted to share what led me to building my own soil. I wanted a turn key grow to have a hobby I enjoy and a side hustle when I put this grow together. I bought lights, a tent, and premade KiS Organics soil that was supposed to be water only because I prefer organic herb, but I didn’t want to go through the hassle of making soil, which I’ve done many times before. I made it 3 weeks into that grow before scrapping it and throwing the “soil” in a backyard garden bed. Turns out that water only mix for KiS was essentially peat-moss and 50% perlite. I was so mad because that soil had to be shipped freight to my house and ended up being more expensive than homemade soil, and was TERRIBLE.

Anyways, lesson learned. Many of my lessons have come from trying to take shortcuts or “the easy way” and it not working out in my favor.

That’s when I decided I was going to try to build the best soil within my ability. I had previously grown in versions of Coot’s Mix that I had put together with pretty darn good success. But I often experienced ph swings and nutrient deficiencies that I couldn’t track down the source of, despite the herb being excellent.

This is what led me down the rabbit hole of mineral balancing and getting a better understanding of soil structure and chemistry. I wanted to use a type of Coot’s Mix, that I knew could get good results from previous experience, but use some soil science to try and balance the mineral ratios and be thoughtful about what inputs I used and how much. I was aiming for that “perfectly” balanced soil that could take a plant all the way through a life cycle on water only, for multiple cycles, with minimal inputs (dry amendments).

I dare say I think I may have gotten pretty darn close to it. I had my soil sent out to Logan Labs (in Ohio?) and the results came back excellent (except ph was a lil high) with only minor recommendations. I made the adjustments and was off to planting. You’ll see my soil reports as attached files.

Soil Mix:

Base Mix

Peat Moss 38%
Compost/Castings 33%
Aeration 20%
Activated Biochar 8-9%

Amendments

Volcanic Rock Dust
Basalt Rock Dust
Montana Grow Silica (Volcanic Tuff)
Green Sand
Oyster Shell Flour
Montmorillonite Clay
Kelp meal
Feather meal
Neem Seed Meal
Alfalfa Meal
Fish Meal
Crab Meal
Bone Meal
Big-6 Micronutrients

So I mixed up 180 gallons and watered it all in to let it “cook” for about 3 weeks. I moistened and mixed it like a compost pile, trying to keep as many beneficial microbes active as I could.

IMG_8825.jpeg

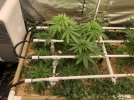
When it was done cooking I put it in my 3’ x 6’ Grass Roots Living Soil Bed and planted my seeds and cover crop.

IMG_9100.jpeg
IMG_9097.jpeg
 

Attachments

The last run (and first run) turned out great, but I did experience some deficiencies towards late flower. I’m ashamed to admit that I got lazy after planting and didn’t keep an eye on my soil PH, which resulted in some of the less than perfect growth at the finish.

I have been prepping my soil for the past 5 months getting ready to get my new round going. The soil had been sitting dry and desiccated for about 1-1/2 years, so it was a slow methodical practice of hand watering by sprayer over the course of about three weeks to re moisten the soil. I then planted an entire bed of nitrogen and phosphorus fixing cover crop and let them go for 2 months. I then chopped and tilled in the entire cover crop to the top 6” of soil. My PH was still high so I added some soil sulfur and planted another cover crop . I just recently chopped this crop and left it as mulch while I was bringing my PH into a more suitable range.

1st cover crop before chop. There were peas, beans, clover, alfalfa, buckwheat, and hairy vetch in the mix.
IMG_1859.jpeg

After chopping and tilling into top 6”.
IMG_1966.jpeg
Added Soil Sulfur, layered some ew castings, and covered with straw mulch

Then I did it all over again, without the tilling. This round also didn’t have any beans.
IMG_2087.jpeg

I let this one really build up some biomass…
IMG_2172.jpeg

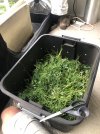
Chop & Drop

IMG_2182.jpeg

IMG_2183.jpeg

IMG_2184.jpeg

IMG_2187.jpeg

Covered with some more straw and now we’re ready to start the show.
 
Last edited:
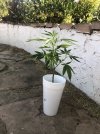
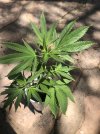
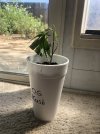
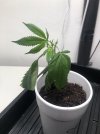
Now onto my current Genetics. This will be round 2 for cannabis in this tent. I’m super excited for this round as I have some sweet genetics to try and I plan on keeping a much closer eye on everything this time around.

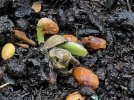
I recently acquired 2 different cuts of Sour Diesel from Gaby Staten Island, and I popped some 7 year old Paonia Purple Paralyzer seeds that I got while I was working an orchard in Paonia Colorado in 2019. The seeds were from the previous season, from a guy who supposedly worked for an old head lady who kept the lineage going since the early 70’s by doing seed increases every year. 8 out of 17 popped which ain’t bad considered what these seeds have gone through in the past 7 years.

IMG_2801.jpeg
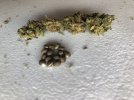
This is some of the herb that this guy gave me along with the seeds. It looks pretty midsy, but let me tell you this shit was STRONG, straight couch lock indica stupefying stone. Taste was like spice and incense.

The seeds definitely have a purple hue to them.
IMG_2807.jpeg
 
These were the Original Sour D cuts when I first got them about 3 weeks ago. They came in a little rough, and my temporary veg space doesn’t have the friendliest environment at the moment. But you’ll see that they are coming along…

IMG_2217.jpeg

About 9 days after transplanting into the bed
IMG_2332.jpeg

IMG_2394.jpeg

IMG_2393.jpeg

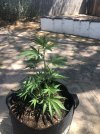
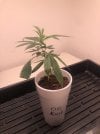
Here are the Paonia Purple Paralyzers which I will be abbreviating as PPP from now on.

IMG_2391.jpeg

IMG_2392.jpeg
 
Definitely gonna watch this. Really nice with the mulch! :hump:
And I love the organics, never had the chance for them myself... I'm gonna learn many things here! Cheers!

Glad to have you here! I love growing organic herb! It’s not always the easiest route, but I believe it provides the best buds when done proper.
This is sometimes easier said than done lol, but we do what we can. :joint:
 
Weekly Update

Plants are coming along in spite of me doing dumb stuff. This past Thursday I accidentally watered my plants too soon and overwatered them. It had been awhile since I had calibrated my soil moisture sensors and they were a good bit off. One down side to the Blumat Moisture Sensors is that they gradually lose water through their ceramic base and need to be topped off every few weeks, which I failed to do.
I also gave the plants a few extra hours of light that same day because I was doing some work to finally get the tent zipped up. So they went from the standard 12:1 GLR veg schedule to getting close to 16 hours of light. Well after all that, they were less than pumped about it.
I foliar sprayed some Horticultural Aloe Vera on the plants Saturday night to try to alleviate some of the stress, which seemed to help. But, when I went to spray my plants, I hung my environmental controller sensor up out of the way so it didn’t get wet, and accidentally left it up there until this afternoon. My tents airflow stays fairly well mixed up, but the heat from the LED/Driver was causing the sensor to think the room was a few degrees warmer than it was. I noticed this afternoon when I was checking leaf temps and they were reading way too low for what temp the enviro controller was saying the tent was at.
So the plants got overwatered, over-lighted, and then kept in a somewhat cool environment, all since Thursday.
I fried one of my environmental controller sensors on my last run from getting it wet (which is why I’m paranoid about hanging the sensor out of harms way). After that I couldn’t run my CO2 tank and effectively couldn’t close up my tent. This is part of the reason why I was still messing around and setting stuff up. This is really the first go with the fully sealed CO2 enriched space. My veg is whole other story… work in progress.

Anyways, now I think we should be good in the tent for the rest of the run, so long as I don’t screw anything else up. Temp, RH, and CO2 are holding pretty steady. Moisture & PH meters are calibrated. Now we are cooking with fire.

IMG_2496.jpeg

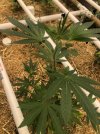
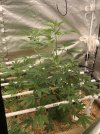
“Original” Sour Diesels getting ready for a topping so I can get some clones and manage height. These are pretty vigorous ladies when they’re dug in.

IMG_2471.jpeg

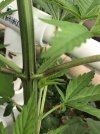
Got these sweet purple pin stripes 12 hours after over-watering and over lighting my plants :wall:
IMG_2472.jpeg

“Staten Island” Sour Diesel below. Starting to show some nicer new growth, getting dug in.
IMG_2466.jpeg
IMG_2493.jpeg

I’m really excited for this one because the reviews have been really good on the smoke report. I haven’t smoked real sour diesel since 2008 and I miss it so much. I’m really hoping either of these cuts has that deep sour gas funk that I’m searching for.


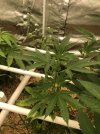
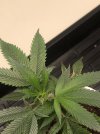
The PPP plants are coming along. The bigger plants (about 1 week older) were probably the most effected by the stress that they were put through last week, but are starting to make a turn around.

IMG_2487.jpeg
IMG_2467.jpeg
IMG_2495.jpeg

The smaller younger plants didn’t seem to notice
IMG_2492.jpeg


I’m getting all these plants big enough to be able to get a clone off of each one. Once clones have been rooted, these plants will be put into flower/sexed/culled. I’m looking for a male and Female Paralyzer for a seed increase, but ultimately I’m just looking for a winner keeper female and some seed stock.

I’ll do a follow up in the next day or two to show the progress of the plants after being in a more friendly environment for a bit.
 
Last edited:
I ended up watering the bed Tuesday afternoon as everything is starting to drink a bit more. This was the first real watering other than spritzing the topsoil since last Thursday. Plants needed the water, but are still somewhat on the recovery from last week’s stress.
These pics are from yesterday afternoon.

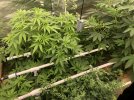
IMG_2509.jpeg
IMG_2511.jpeg


IMG_2510.jpeg
IMG_2514.jpeg

Gonna have to take my cuttings this afternoon from most of the plants after I put together an impromptu clone light. I’ll probably also remove some of the largest fan leaves from the Purple Paralyzers as they have some hand sized fans that are crowding the smaller plants.

I also turned the temp down a touch from 83 to 82F and RH down from 65% to 63%. This usually gets the leaf temps between 77-80F. The Diesels seem to appreciate the slightly cooler temperatures, but we’ll see after a few days how they respond.

Environment is holding pretty dialed.
IMG_2502.jpeg

IMG_2503.jpeg

My soil when at field capacity moisture ends up around 50-52 mbar. I usually do pretty deep watering to make sure the whole depth of soil gets replenished with moisture. I have (6x) 7” soil moisture meters to measure root zones and (1x) 16” moisture meter to measure the bottom of the garden bed. I try not to let the soil get much drier than 120 mbar.
These were readings from yesterday afternoon (22 hours after watering).

7” sensor
IMG_2507.jpeg

16” sensor
IMG_2505.jpeg

My soil PH actually started creeping back up again (between 6.5- 6.9) so I will have to check on that at least once a week. I believe I have a touch too much calcium carbonate in the soil mix which makes bringing the ph down a real pain in the ass.

IMG_2518.jpeg

IMG_2520.jpeg


I’ll post again after I get home from work to show 24 hours of progress and what the soil moisture is doing.
 
Plants are drinking now.

IMG_2545.jpeg
IMG_2541.jpeg

IMG_2547.jpeg
IMG_2543.jpeg

The three biggest PPP plants are drinking a lot. I might have to start supplementing watering for the thirsty ones between irrigation cycles.
IMG_2544.jpeg


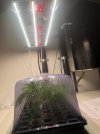
Didn’t get to taking cuts today, but I did put together a quickie fixture with 2 Bridgelux EB Thrive 4000k strips with (4) 3W Cree 660nm from an old fixture all run at 350ma on a Meanwell LPF-16D-48. Probably about 20W or so.

IMG_2553.jpeg

Ready to take cuts tomorrow
IMG_2552.jpeg
 
Was busy over the weekend so a little late for the weekly update. I took cuttings from 10/12 plants on Saturday afternoon.

IMG_2610.jpeg

IMG_2609.jpeg

IMG_2575.jpeg

Took some big fans from the Purple Paralyzers to free up some airflow around the smaller plants
IMG_2578.jpeg

One of the Paralyzer plants and a Bubblegum Breath were still too small to take a cut, so those will likely get cut and flipped when I’m ready.

Cuts in the humidity dome
IMG_2615.jpeg

I actually redid the clone light on Saturday before taking cuts. The first iteration visually seemed red heavy, so I swapped the driver out for the 4000K strips for a 600ma driver. Then I added 1 Bridgelux Vesta Thrive 2750 strip and ran that with the reds at 350ma. Spectrum quality appears much more balanced now.
IMG_2600.jpeg

I still gotta throw a net over the Sours to manage height and get in for a little canopy clean up. I’m still going to try to wait for the cuttings to root before flipping the plants, so it will be a test of my canopy management skills. So far I have put zero effort into any training because all these plants are new to me and I like to see how they are naturally structured. But I’ll have to do some training if I don’t want the diesels ending up in the light. Im hoping these cuts shoot some roots quick.

Right now plants are drinking every 3rd day with the bigger PPP plants needing water at every 2 days, which I just had water to get them by until main irrigation cycle. Hoping to flip soon.
Happy Gardening!
 
Back
Top