MJL520
Active Member
Closet Grow Journal of MJL520
What up rollitup.org???,
MJL520 here to document a grow thats going to take place in my very own closet. Closet grows are great for beginners for a number of reasons. First, they force a new grower to start small. Having too many plants for a first timer can be intimidating and complex, and can all to often lead to failure. Second, good walk in closets are sectioned off from the rest of the room making it easy to control the perimeter of your grow. This will help control odor along with any unwanted people who might happen to see your grow and blow your cover.
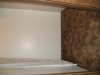
This walk in is located inside one of the bedrooms of an apartment. Luckily, its an extra bedroom so no one sleeps in there or spends a lot of time in there. There are no extra couches, beds, or televisions located in the outside room, making the chance very small that unwanted guests will come into this room and spot the grow. The windows in the room are covered with thick yet inconspicuous curtains to block out all light coming in and going out of the room. However I can still open the window and bring in cool fresh air. The window is located over 5 floors up, so no one will pass by the window and notice anything suspicious like smells or light leaks.
(see pic #1)
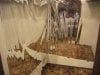
First off, I cleaned the room top and bottom with germ and mold killing chemicals. Having the cleanest possible equipment and environment will prevent future headaches and problems, so take care to clean thoroughly. I then hung Reflective Film on all the walls to deflect light back to the grow area. I love this product. The film is diamond patterned so light is diffused and reflected evenly back to the plants. This also reduces heat build up so temps in the grow room do not fluctuate.
(see pic #2)
After hanging the film I get my pots of soil ready. If you see one of my previous grows you will notice I used 5 gallon hydro buckets. This was a successful method for me, but I use soil now because its easier to work with and eliminates guess work.
(see pic #3)
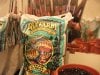
I prefer to use Fox Farms Ocean Forest® organic soil. The soil is premixed with additives such as composed forest humus, granite dust, fossilized bat guano, perlite (for drainage and aeration), shrimp meal, earthworm castings, crab meal, and a mix of Pacific Northwest sea-going fish emulsion. All good stuff that plants crave during all stages of growth. For an added bonus, they also add oyster shell to prevent ph fluctuation in the soil, giving the plants a stable and consistent medium to thrive in. Having organic additives already present in the soil means that I wont have to worry about adding plant fertilizers for about a month to 2 months. Then later during flowering, I can give them a little boost of food before I begin the pre-harvest flushing process.
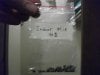
After filling each bucket I ran 5.9 pH water through them to pack in the soil. I never pack soil by hand. This will result in inconsistent soil that is tight in some areas and loose in others. Roots will not spread evenly, and if the roots arent thriving, the plant wont be either. I let the water run through and drain out the bottom in a utility sink. This prevents messy pots from dirtying up the grow area. I always try to do all my water work outside to room its self.
(see pic #4)
I now need to prepare my seeds. In the past I used bag seed and the results were far better than I expected. This time I was able to acquire some seed free of charge through a friend. They supposedly came from a long time grower who is now retired. He had a large amount of seeds from past grows and he gifted my friend with a good deal of them. My friend then gifted me and for that I thank him. They are Indica-dominate and have only a 7 week flowering cycle. I plan on vegging them for 21- 28 days and them flowering them. After they show their sex, the males will be disregarded and the females will be transferred to 5-gallon pots for the remainder of the grow.
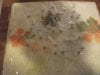
I place the seeds in a small plastic baggy that once contained a 1/2 ounce of sticky green. I placed the seeds in between a piece of paper towel and poured in ph balanced warm water. Not too much though. Dont flood the bag, just moisten the towel. Then place the bag flatly in a dark warm place. I use the inch or so between my computer tower and my desk. Within 72 hrs they should crack be ready.
(see pic #5)
Now its time to hang the light. I use bolts that have loops on the end to attach the chains to the ceiling. This is a sure way to secure the lights and prevent them from moving or, God forbid, falling. I then use easily adjustable chains to attach the light to a simple basic reflector. In a more complex set up I would recommend using a reflector that had vent attachments to easily transfer hot air out of the grow room. This isnt needed now though because ventilation will take place through the open closet door.
(see pic #5)
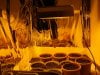
I use a 400 watt switchable Lumatek® electronic ballast. It is capable of running at both 120 and 240 volts, depending on which bulb is in the socket. The bulb itself is a 400 watt Hotilux® HPS bulb. I prefer the efficiency of a HPS over a MH, and the HPS is better for flowering which is the longest and most crucial part of the growing process. But a bigger set up will often use both bulbs to better cover the full light spectrum. I attach the light directly to a digital light timer that is plugged directly into the wall. When the grow cycle start the plants will receive 18 hours of light and 6 hours of darkness every 24 hour photo period. Plants dont utilize light after 18-20 hours every day, so setting the lights to go off will help keep temps down and will cut back on electricity usage.
(see pic #6)
I now have everything set up and ready to go. I just need my seedlings at this point. There is a fan blowing cool air into the room at the entrance of the closet. Not pictured is a second fan at the ceiling that is blowing hot air our. Since hot air rises the hot air will be expelled while fresh cool air comes in. This simple vent process is inexpensive and efficient enough for this small grow. I assure that my plants receive constant fresh air while simultaneously expelling hot unwanted air.
Make sure to check back for any updates or pictures. I welcome all questions, inquires, and especially suggestions or advice. In no way do I claim to be an expert or master grower. Im just a guy that loves the cannabis plant and wants to lean more about this great plant while sharing my current knowledge about it. Peace and pass the marijuana.
-MJL520
 -
-Attachments
-
 37.4 KB Views: 8
 -
 52.8 KB Views: 13
 -
 74.3 KB Views: 8
 -
 38.9 KB Views: 10
 -
 40.8 KB Views: 9
 -
 57.1 KB Views: 8
 -
 76.2 KB Views: 18